Zendesk is a cloud-based customer relationship management system that is trusted by hundreds of thousands of businesses worldwide. It is one of the leading customer support services that allow you to interact with your clients at any platform. With the help of our Zendesk Support plugin, you can easily integrate your WooCommerce’s store to your Zendesk Account.
- Download the .zip file from your WooCommerce account.
- Go to: WordPress Admin > Plugins > Add New and Upload Plugin with the file you downloaded with Choose File.
- Install Now and Activate your Zendesk Support plugin.
Upon activating the plugin for the first time, there should be a banner along the top of your screen. Click the link to access the plugin’s settings.
 Alternatively, you can access the settings using the method below:
- In your WordPress admin page, navigate to WooCommerce > Settings
- Click the Integration > Zendesk Support Integration.
If you already have a Zendesk account set up, feel free to skip this step.
- Click here to sign up and activate your free trial.
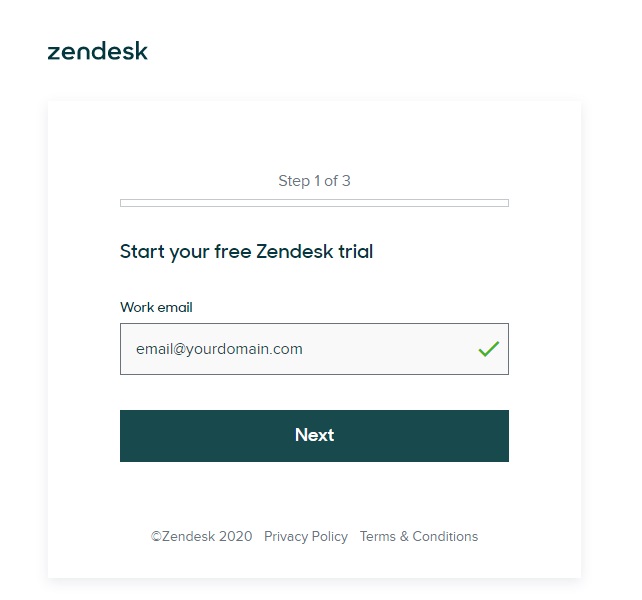
- You will be redirected to set up and will be asked to enter your Work email address. Enter your email address and click Next.
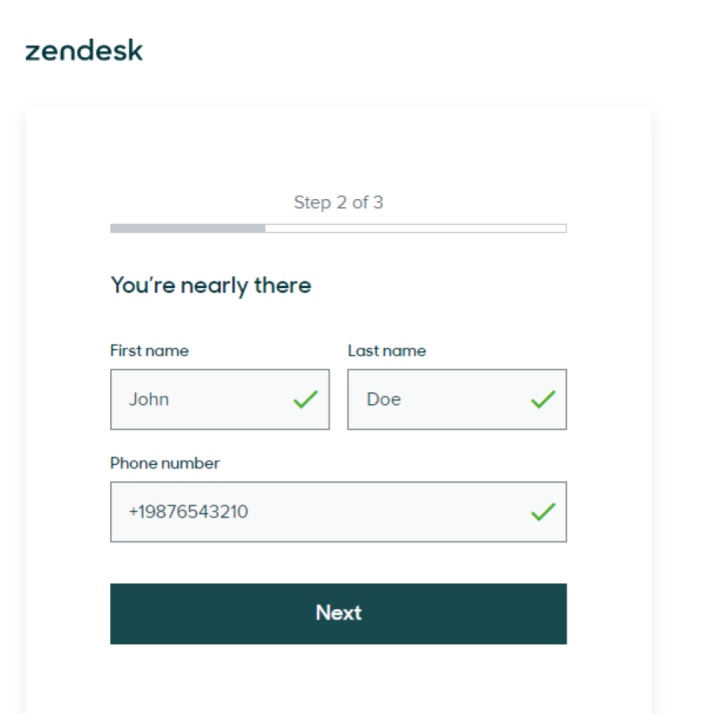
- Enter first, last name and phone number and click Next.
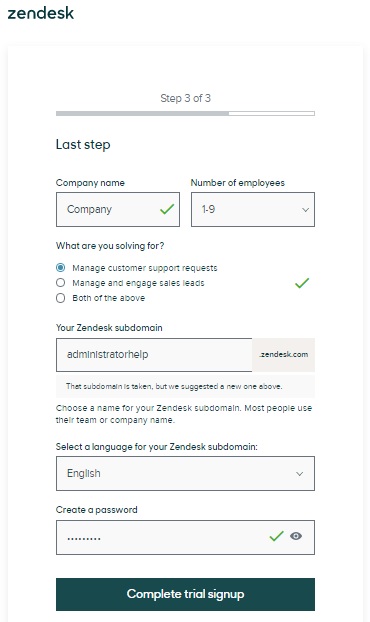
- On the next step, you will be asked to enter your Company name, Number of employees, your Zendesk subdomain and Password. Enter your information, answer the question by selecting Manage customer support requests and click Complete trial signup.
- Upon activating your Zendesk, a verification email will be sent to your email address. Click on the link to verify your account. On successful verification, you will be redirected to the dashboard of your zendesk account.
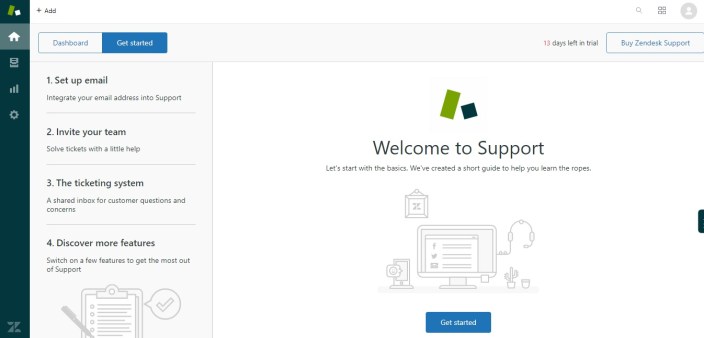
- You have successfully signed up for your Zendesk account.
- Goto: your WP Dashboard> WooCommerce > Settings > Integration > Zendesk support Integration
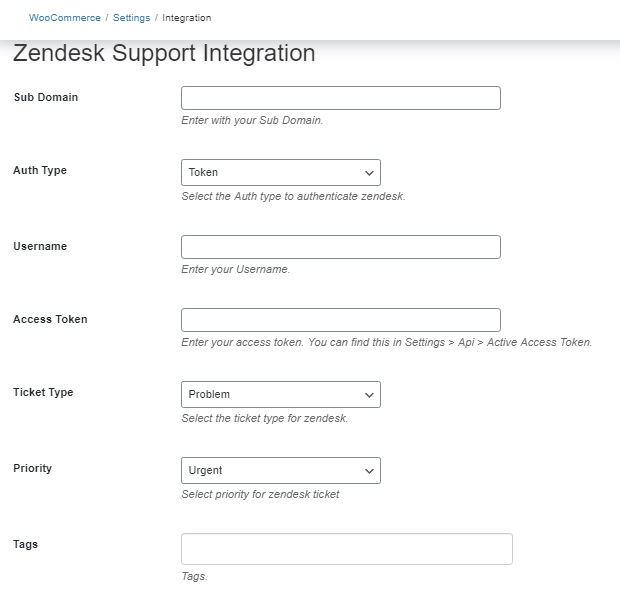
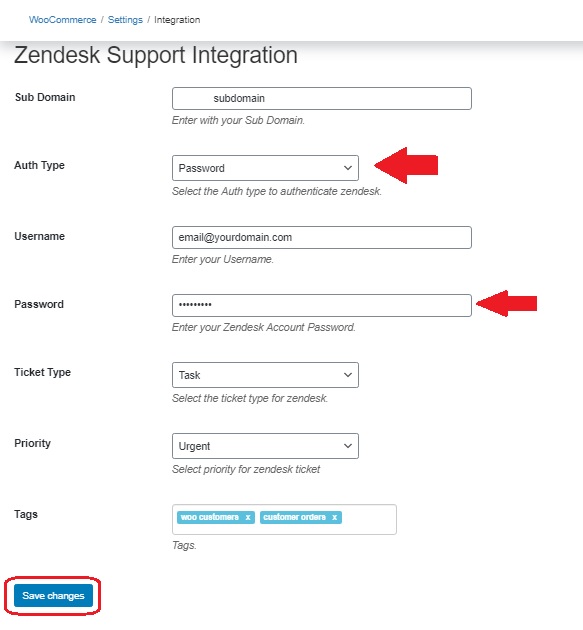
- In subdomain tab, enter the subdomain name you have set for your zendesk account. For example, in ‘mycompany.zendesk.com’, the ‘mycompany’ is the name of your subdomain.
- In Auth type, select Token or Password from the dropdown menu.
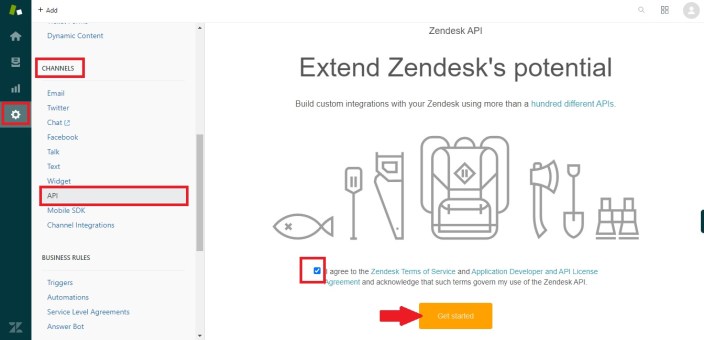
Once you have set your zendesk account, goto the zendesk dashboard on the left-hand side, click the admin icon  and then scroll down to channels and click on API.
For first time users, the agreement statement would be visible, check it and click
Get started.
For Token-based settings
Enable Token Access and click on the plus sign below to set Active API Token. After clicking on the plus sign a tab will open containing your API Token. Give the token any name in API Token description and copy the API Token and store it to a secure place as it won’t be shown again.
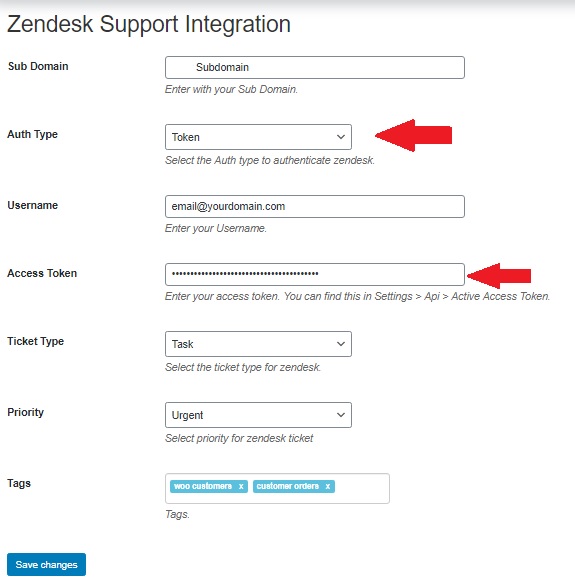
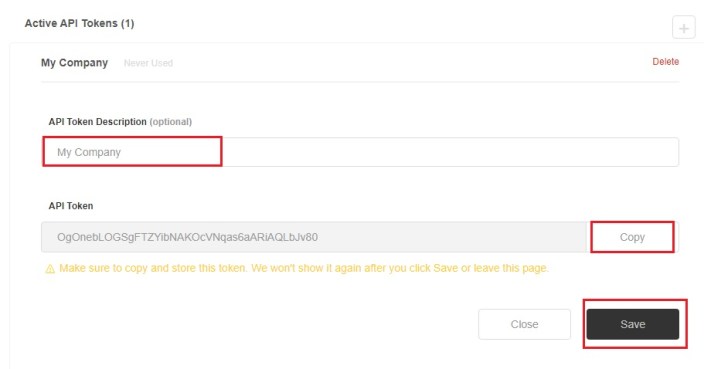 Click save and paste your API Token to Access Token tab in the Zendesk Support Integration menu in your WooCommerce store settings.
Set Ticket Type and Priority from the drop-down menu.
Enter Tags. You can enter more than one tags by entering “comma” after every tag for your zendesk tickets and click Save changes.
You are all set up!
For Password-based settings
For Password-based settings, goto the zendesk dashboard on the left-hand side, click the admin icon  and then scroll down to Channels and click on API. Enable Password Access.
 Goto: Your website Dashboard > WooCommerce > Settings > Integration > Zendesk Support Integration and enter the password that you have set for your zendesk account and do rest of the settings as mentioned in token-based settings and click Save changes. You are all set up.
Viewing New Orders and Tickets in Zendesk
When an order or enquiry is placed by the buyer a new ticket is automatically generated in Zendesk for the customer. You are notified via email and in your zendesk account. 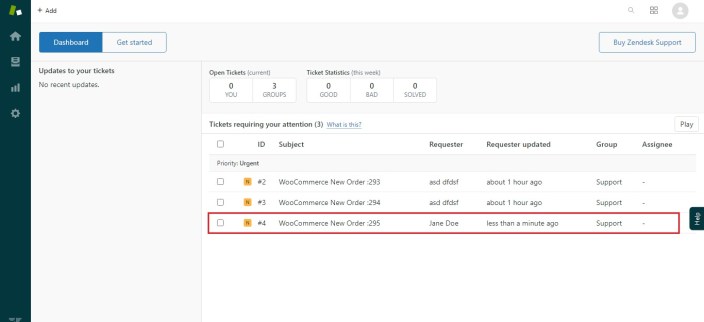
Responding to Customer Enquiries and wooCommerce store emails:
You can easily follow up on every ticket and enquiry. You can communicate internally and with the customer on the same page from your Zendesk Dashboard with a complete sequence and history of customer communication. This allows you to combine the support of Zendesk with your WooCommerce Store giving your store an robust support system.
Take advantage of Zendesk Automations, Categorisation, Query Triaging and much more by integrating Zendesk to your WooCommerce store with the Zendesk for WooCommere Plugin.
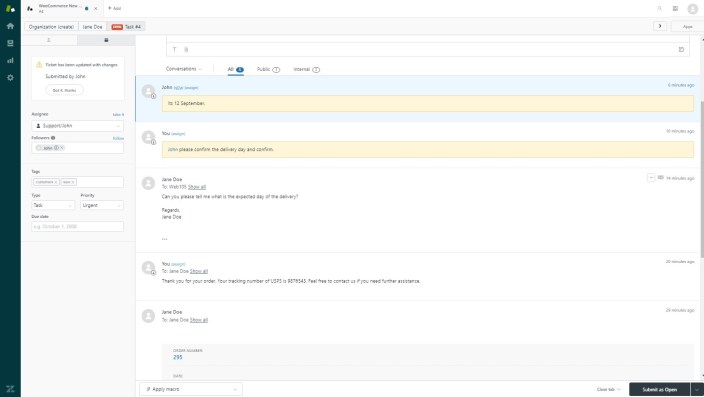 You can assign the ticket to your team member or department for better understanding and quick resolution of the enquiries by adding followers or assignee.
 Manage your store queries, order emails, and customer support all within Zendesk.
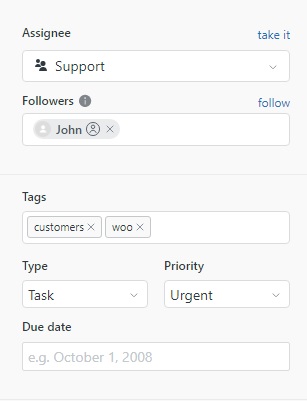 The Order will be recorded as a new Ticket and associated with the customer account. The customer account will be created if it does not already exist. This includes the email address and other customer information which is available.
Zendesk Support Integration plugin will allow you to specify a Tag for WooCommerce orders. Our plugin will allow you to choose the type of ticket in Zendresk Support for WooCommerce Orders.
 Does the Zendesk for WooCommerce Integration provide an Autoresponder / chatbot to answer customer questions automatically?
Automated email and advanced autoresponder features are enabled by this plugin through integrating your store with Zendesk. These are features of Zendesk, only the WooCommerce to Zendesk integration is handled by the plugin.
Zendesk is a powerful customer support software suite. Any advanced customer support automation is recommended to be configured through your Zendesk. The plugin allows you to integrate your WooCommerce store customer data into Zendesk with all the information to began on-boarding and taking care of your customers.
Have a question before you buy? Please fill out this pre-sales form.
Already purchased and need some assistance? Get in touch with a Happiness Engineer via the Help Desk.
 Alternatively, you can access the settings using the method below:


 After clicking on the plus sign a tab will open containing your API Token. Give the token any name in API Token description and copy the API Token and store it to a secure place as it won’t be shown again.
 Click save and paste your API Token to Access Token tab in the Zendesk Support Integration menu in your WooCommerce store settings.
Set Ticket Type and Priority from the drop-down menu.
Enter Tags. You can enter more than one tags by entering “comma” after every tag for your zendesk tickets and click Save changes.
You are all set up!
 Goto: Your website Dashboard > WooCommerce > Settings > Integration > Zendesk Support Integration and enter the password that you have set for your zendesk account and do rest of the settings as mentioned in token-based settings and click Save changes. You are all set up.


