Documentation of WooCommerce Checkout Fields Manager.
Installation
↑ Back to top- Download the .zip file from your WooCommerce account.
- Go to: WordPress Admin > Plugins > Add New and Upload Plugin. Select Choose file for the file you have downloaded.
- Install Now and Activate.
More information at Install and Activate Plugins/Extensions.
Setup and Configuration
↑ Back to topAfter activating Checkout Fields Manager, “Checkout Fields” will display under the WooCommerce menu in the WordPress admin panel. The general settings for the extension are accessible within WooCommerce > Settings > Checkout Fields tab.
How to Add WooCommerce Checkout Field:
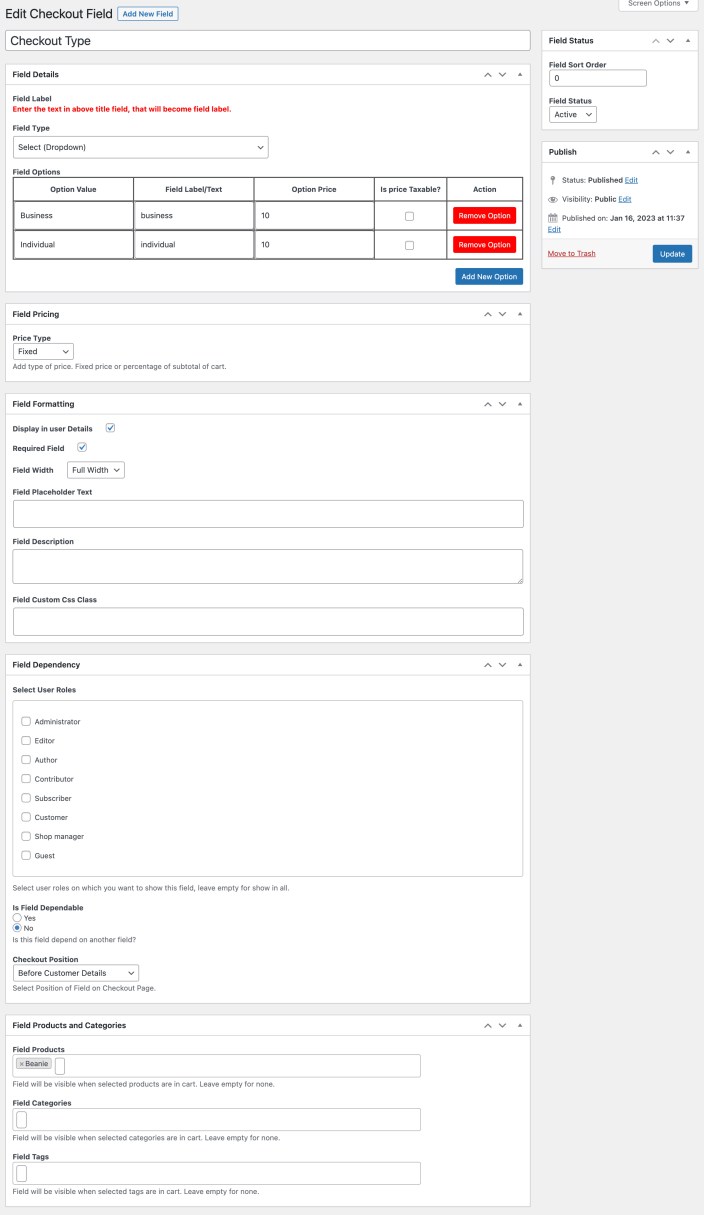
↑ Back to topTo add new checkout fields, go to WooCommerce > Checkout Fields. You can add multiple checkout fields and trigger them based on products, categories, user roles and more. While adding new custom fields, the following customizations are available:
- Select field label
- Select field sorting order
- Select from 19 field types (See list below)
- Add field price (Leave field empty to add no additional field price)
- Make fields optional or mandatory
- Display field in WP-admin user detail page
- Make fields full or half width
- Add field placeholder, description and custom CSS
- Choose from 15 display positions
- Assign fields to specific user roles
(Select user role to display field to selected user roles only) - Make fields dependable to existing field
(Option to make field dependable to another dependable field too – build dependency to nth level) - Assign field to specific products, categories and tags
(Once attached, the field will only display when any of the selected product is in cart.)

Field positions on checkout page:
↑ Back to topThe extension comes with 15 pre-defined field positions to place on your checkout page.
- Before or After Customer Details
- Before or After the Billing Form
- Before or After the Shipping Form
- Before or After Terms and Conditions
- Before or After the Order Review
- Before or After the Order Notes
- Before or After Order Submit button
- Before Order Review heading
Restrict Fields by User Roles:
↑ Back to topOnce a field is assigned to a specific user role, it will appear on checkout for the applied user role only. This assists in keeping the checkout page clean and only shows fields when needed.
- Before or after the Terms and Conditions
- Before or after the Order Submit Button
Dependable Fields:
↑ Back to topWhile creating new field, you can choose make it dependable to other fields. This helps in keeping the checkout page clean and display fields only when the previous relevant field value is selected. With version 2.0.0 and onward, the extension supports dependability to nth level where you can make fields dependable to another dependable fields.
Field Price:
↑ Back to topYou set field price in fixed or percentage amount. For field that has sub-level options like dropdown, you can add price for each dropdown option. If you don’t want to add price, leave the price field empty.
ReCaptcha field keys:
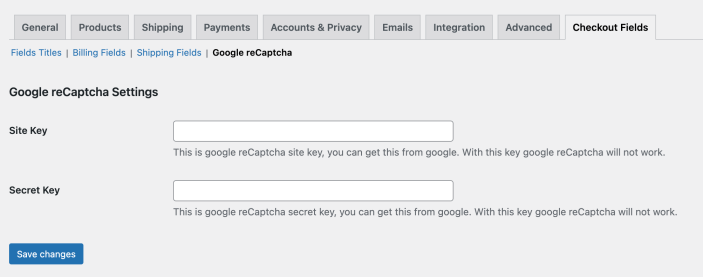
↑ Back to topOnce you have created reCaptcha fields, you will need to add Google reCaptcha keys under WooCommerce>Settings>Checkout Fields>reCaptcha.

How to Edit WooCommerce Checkout Fields
↑ Back to topUsing the Checkout Fields Manage you can customize the title and visibility of your existing checkout fields i.e default shipping and billing. Not only you can customize their title, you can also show or hide them based on user roles.
Change default field labels/titles:
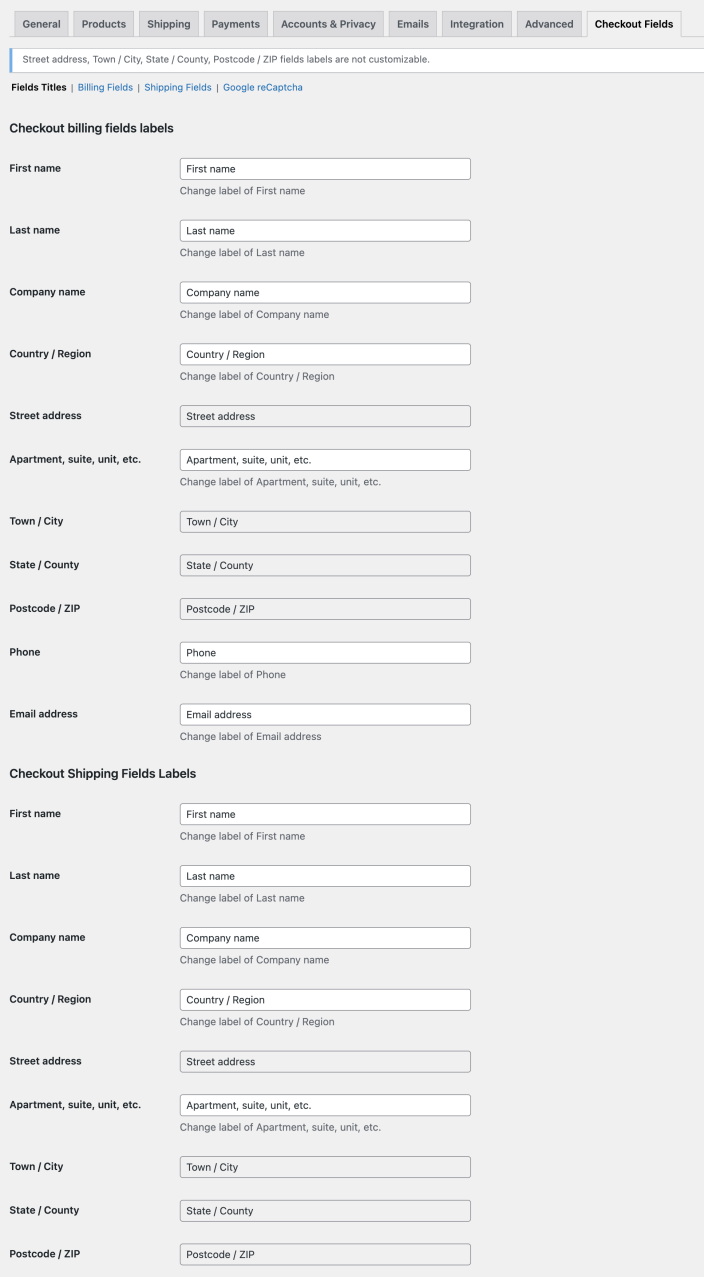
↑ Back to topTo change the labels of default billing and shipping fields, navigate to: WooCommerce > Settings > Checkout Fields > Fields Titles.

Hide default fields based on user roles:
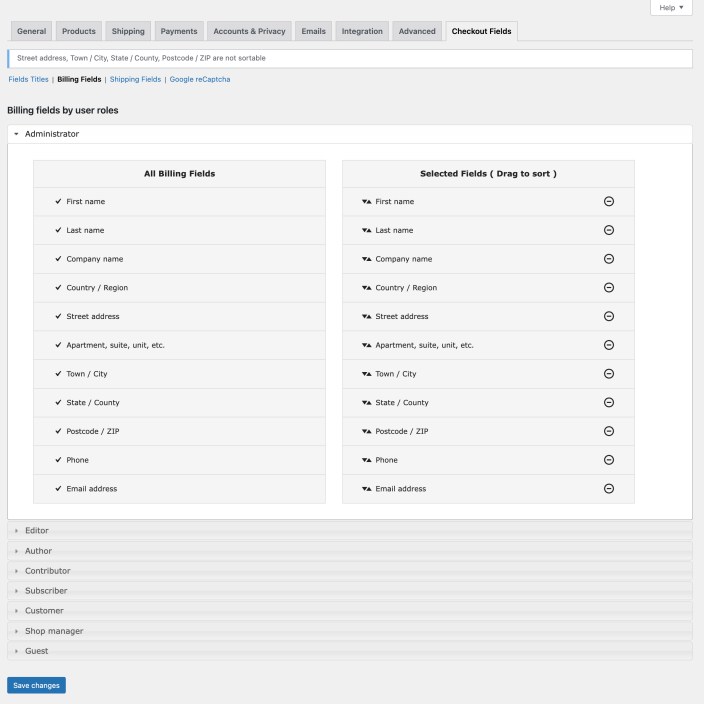
↑ Back to topYou can choose to show/hide and change the sorting order of billing and shipping fields based on user roles. You can manage visibility of both billing and shipping fields based on user roles.

List of 19 Fields Types:
↑ Back to top- Text
- Text area
- Select box
- Multi-select box
- File Upload (New)
- Checkbox
- Multi-checkbox
- Radio button
- Number
- Password (secret input field)
- Color picker
- Date picker (calendar)
- Time picker
- Google ReCAPTCHA
- Heading
- Message
- VAT with validation
- Description (message display only)
VAT VIES Validation:
↑ Back to topThe extension comes with 2 types of VAT validation i.e VAT number length and VIES Validation. European commission is now using SOAP services for VIES VAT validation. In order to VIES validate VAT numbers on your website, please activate SOAP service on your server. Here is how to Activate PHP-SOAP.
FAQs:
↑ Back to topCan we sort custom and default fields togather?
No, due to technical limitation custom fields cannot be mixed with default fields for sorting. However, you can sort custom fields and default fields separately as per your business needs.
How to display fields in order detail page?
The extension automatically show fields in order detail page. No additional setting or coding needed.
