Product Designer for WooCommerce allows your users to design the products as per their preference and purchase them in your Shop.
Installation
↑ Back to top1. Download the product-designer-for-woocommerce.zip file from your WooCommerce account.
2. Go to: WordPress Admin > Plugins > Add New and Upload Plugin with the file you downloaded with Choose File.
3. Install Now and Activate the extension.
More information at: Install and Activate Plugins/Extensions.
Steps to Configure the Plugin
↑ Back to top1. Creating Product Base
↑ Back to topProduct base is where admin can link the customizable products and control the designing options. If there is no active product base, then it is not possible to design products.
To create a new product base or edit an existing one go to “Product Designer > Product Base”.
Click “Add New” button to create a new base.
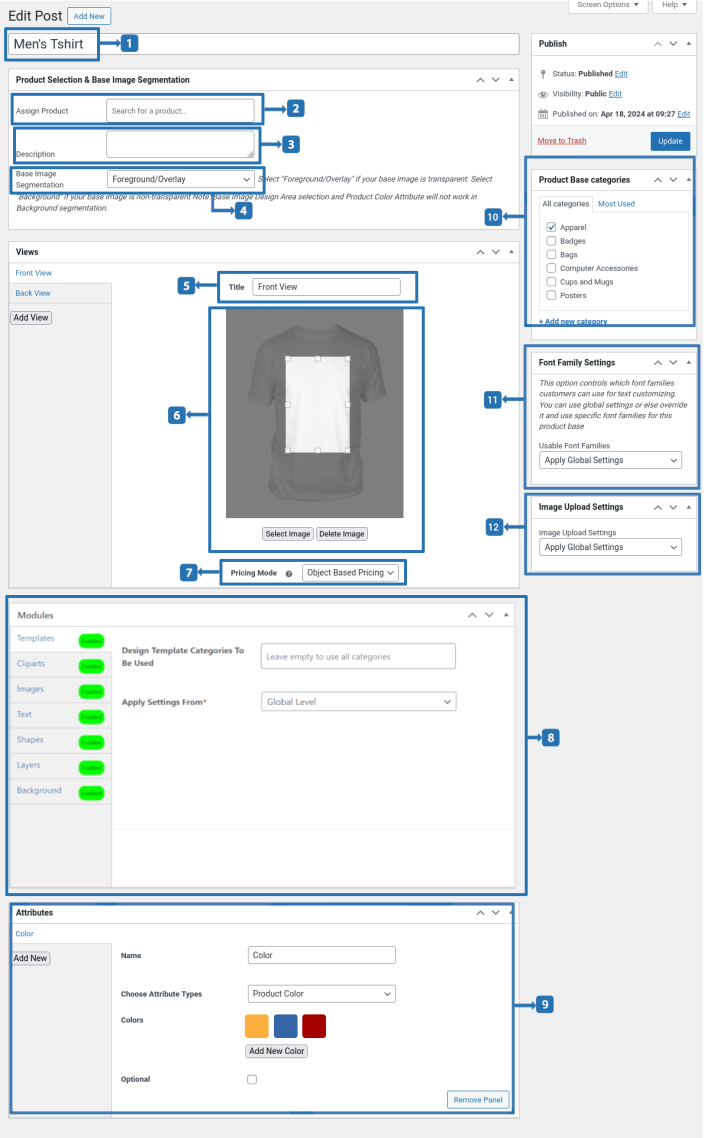
1 – Give the title for the product base in title field.
Product Selection & Base Image Segmentation
2 – In “Assign Product” option, search and select the products which you want to link to the product base.
3 – Give the description for the product base in “Description” field. Description won’t be displayed for customers.
4 – In “Base Image Segmentation” option, select “Foreground/Overlay” if the image which you are going to upload to the base is transparent. Select “Background” if the image is non-transparent.
Note: In Background segmentation, base image selection area and Product Color attribute won’t work.
Note: The default product bases while activating the plugin for the first time on your site were created using transparent images.
View
A product may have multiple sides. For example, front side and back side for a t-shirt. In “View” section, you can create multiple views as per your requirement. Click“Add View” button to add a new view. To upload the base image for the view click “Select Image” and select the base image.
5 – Give the name for the view in “Title” field.
6 – Click the “Select Image” button so that you will be able to upload the product base image. You will be able to set the designing area with the use of cropping tools.
7 – In “Pricing Mode” option select “Object Based Pricing” if you want to charge based on the objects(Templates, Cliparts, Shapes, Images, Text) which the customer used for their design. Select “View Based Pricing” if you want to charge a fixed price for single view customization irrespective of the pricing which you give for objects.
8 – Modules
By default, all the plugin modules will be enabled which you can control globally in “WooCommerce > Product Designer > Settings > Modules”.
In this section, you can override globally set values of each module which will be applied only for the specific base. You can also control object categories(template categories, shape categories, background categories, clipart categories) to be used only for the specific product base in this section.
9 – Attributes
This plugin supports attributes such as i. Product Color, ii. Text Field iii. Text Area iv. Single Select v. Checkbox vi. Radiobox using which you can get values from the customer for the product. Among these attributes, Product Color attribute will directly reflect on the product base(i.e. whatever color customer choose, the product color will change) but it work only if “Base Image Segmentation” option is set as “Foreground/Overlay”.
To create a new attribute,
- Click “Add New” button.
- Give the name for the attribute in “Name” field.
- Select the type of the attribute in “Choose Attribute Type” option.
- If the attribute is optional, then enable “Optional” checkbox. If it is mandatory, then disable the checkbox.
Creating “Product Color” Attribute,
- Click “Add New Color” in “Colors” option.
- Give the name of the color in “Color Title” field.
- If you know the color code of the color which you are going to add enter the code in “Hex code of Color” field. Else, click the color picker and select the color.
- If you want to charge a price for the color, then set the price in the last field.
- Finally click “Add color” button.
- Repeat these steps to add multiple colors.
Creating “Text Field” /”Text Area” Attribute,
- Give the default value for the field in “Enter a Label” option.
- If you want to charge a price for filling the field, then set the price in “Price” field.
Creating “Single Select” /”Checkbox”/”Radiobox” Attribute,
- In “Options” set the field values, name and price in the below format.
- Format: Option value 1|Option name 1|Price 1, Option value 2|Option name 2|Price 2.
- Example:size_small|S|1, size_medium|M|2, size_large|L|3.
10 – Product Base Categories
Click “Add new category” hyperlink to add a new product base category if you want to categorize the product base. To add/remove or to manage the product base categories go to “Product Designer > Product Base Categories”.
11 – Font Family Settings
By default, font families for Text customization will be available for customer based on configuration in “Product Designer > Settings > Modules > Text > Settings > Text Settings > Usable Font Families”. If you want to override the global settings for the product base, choose “Selected Font Families” in Usable Font Families option and choose the font families in “Select Font Families” option.
12 – Image Upload Settings
By default, Image upload settings will work based on the configuration in “Product Designer > Settings > Modules > Images > Settings > Fee Settings”. If you want to override the global settings for the product base, choose “Override Global Settings” and update the settings as per your requirement.
2. Creating Design Templates
↑ Back to topYou can create templates with multiple objects(images, texts, shapes, cliparts) which the customers can use for customizing the products.
To create a design template follow the below steps,
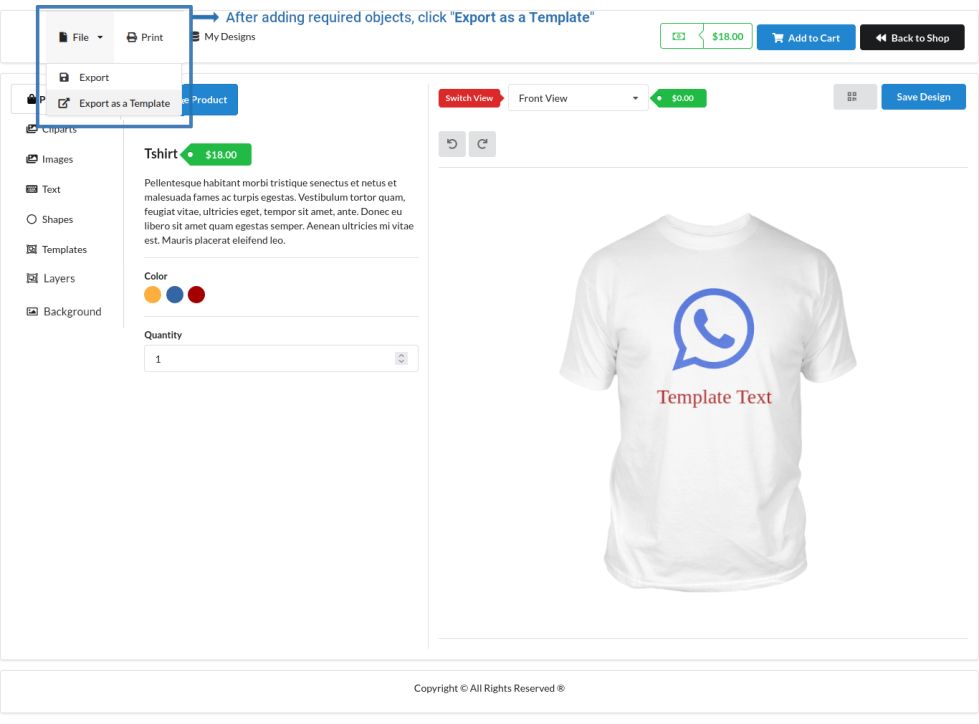
- Go to frontend Product Designer Page.
- Select the product base and product.
- Add the objects as per your requirement.
- Go to “File” menu on top left of product designer page and click “Export as a Template” so that a file named “canvas-object.txt” will be downloaded.
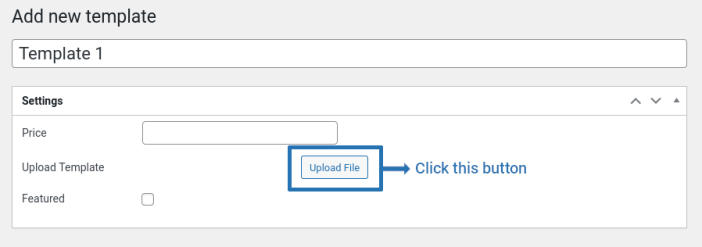
- Now, in admin dashboard go to “Product Designer > Design Templates” and click “Add New” button.
- Give the title for the template.
- In “Price” field, set the price for the template or leave the field empty if you don’t want to charge any price for using the template.
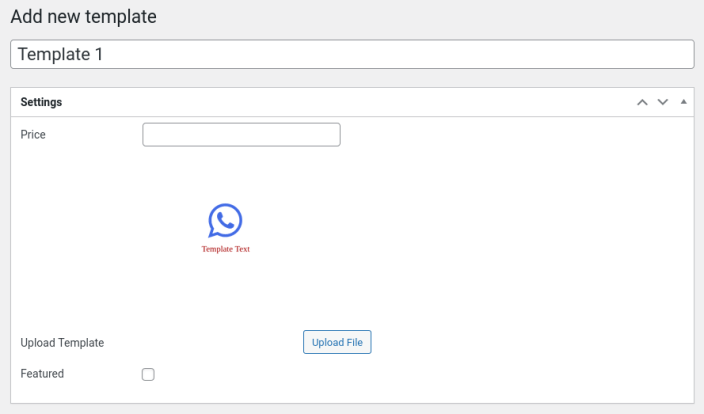
- In “Upload Template” option, click “Upload File” button and choose the file which you have downloaded previously(i.e. canvas-object.txt).
- Once the file is uploaded, the template will be loaded and you can see the preview of the template.
- Click “Add new category” hyperlink in “Design Template Categories” section to add a new design template category if you want to categorize the templates. To add/remove or to manage the design template categories go to “Product Designer > Design Template Categories”.
- Finally Publish the template.
3. Creating Cliparts
↑ Back to topTo create cliparts, go to “Product Designer > Cliparts” and click “Add New” button.
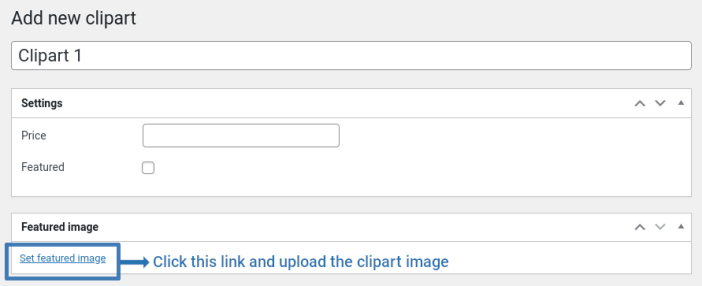
- Give the title for the clipart.
- In “Price” field, set the price for the clipart or leave the field empty if you don’t want to charge any price for the clipart.
- Click “Set featured image” link and select the clipart.
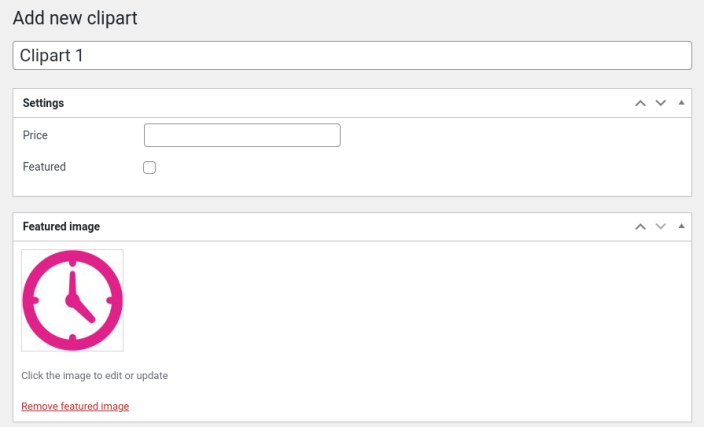
- Once the image is uploaded, you can see the preview of the clipart.
- Click “Add new category” hyperlink in “Clipart Categories” section to add a new clipart category if you want to categorize the templates. To add/remove or to manage the clipart categories go to “Product Designer > Clipart Categories”.
- Finally Publish the clipart.
4. Creating Shapes
↑ Back to topTo create shapes, go to “Product Designer > Shapes” and click “Add New” button.
- Give the title for the shape.
- In the editor area give the svg code for the shape which you are creating. Example code for creating a rectangle shape is given below,
Rectangle SVG Code
<svg width=”300″ height=”130″ >
<rect width=”200″ height=”100″ x=”10″ y=”10″ />
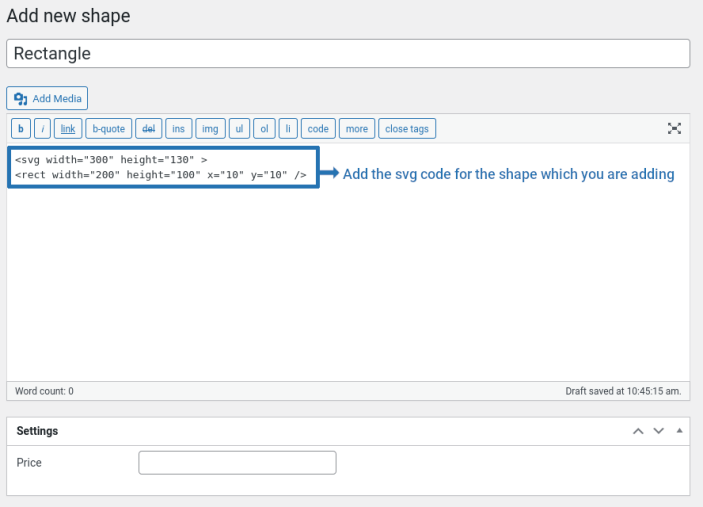
- In “Price” field, set the price for the shape or leave the field empty if you don’t want to charge any price for the shape.
- Click “Add new category” hyperlink in “Shapes Categories” section to add a new shape category if you want to categorize the shapes. To add/remove or to manage the shape categories go to “Product Designer > Shapes Categories”.
- Finally Publish the shape.
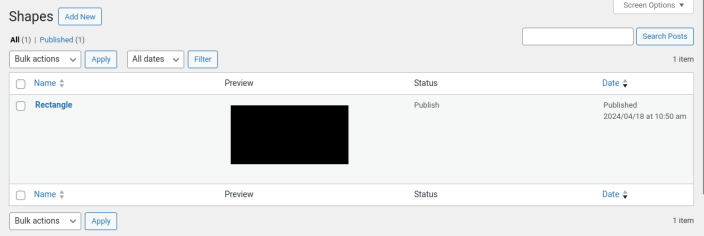
- Go back to “Product Designer > Shapes” where you can see the preview of the shapes added.
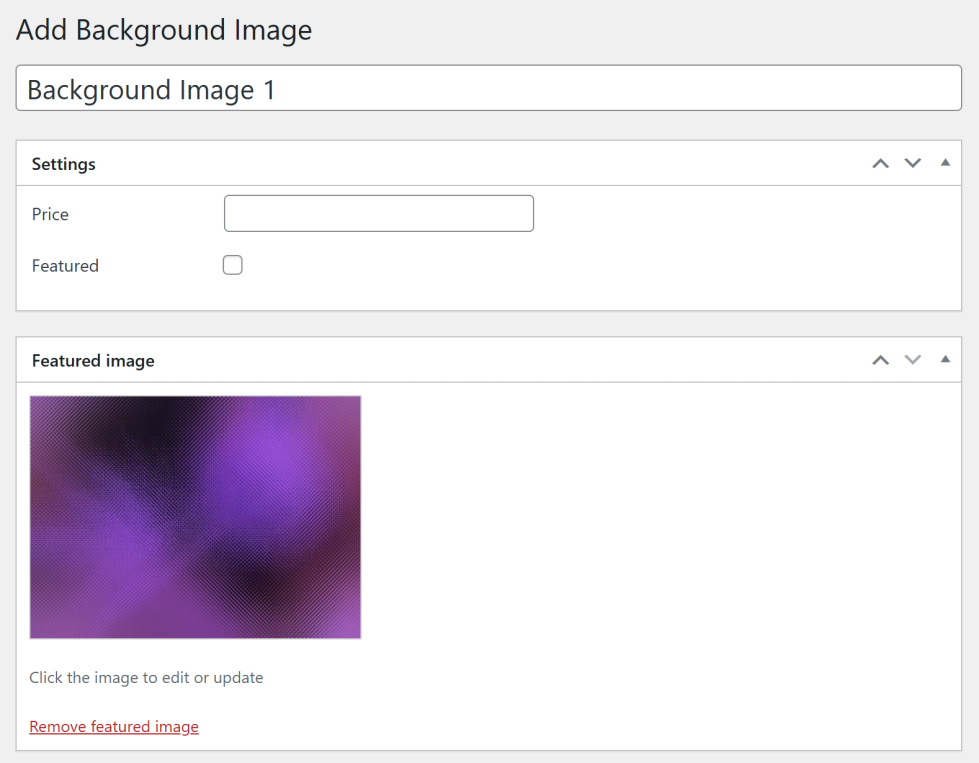
5. Creating Background Images
↑ Back to topTo create background images, go to “Product Designer > Background Images” and click “Add Background Image” button.
- Give the title for the background image.
- In “Price” field, set the price for the background image or leave the field empty if you don’t want to charge any price for it.
- Click “Set featured image” link and select the background image.

- Once the image is uploaded, you can see the preview of the clipart.
- Click “Add new category” hyperlink in “Background Image Categories” section to add a new clipart category if you want to categorize the templates. To add/remove or to manage the background image categories, go to “Product Designer > Background Image Categories”.
- Finally Publish the background image.
Setup and Configuration
↑ Back to topTo setup the plugin, go to “Product Designer > Settings”
General > General > General Settings
↑ Back to top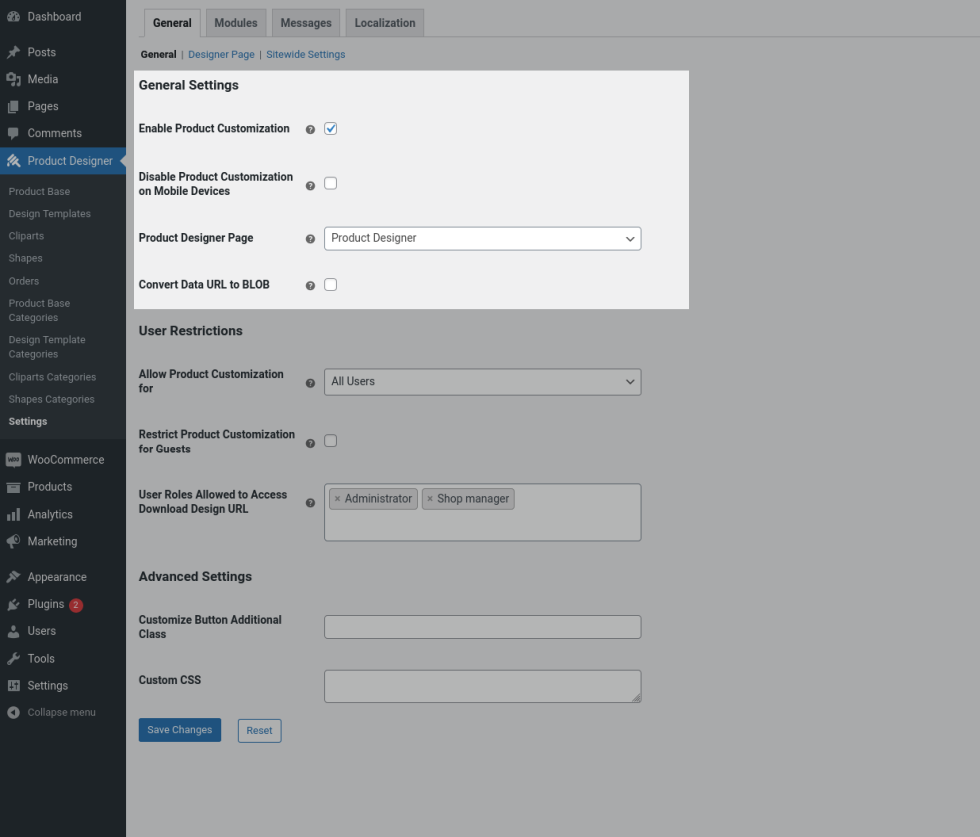
Enable Product Customization – Product customization options and product designer page will work only if this option is enabled.
Disable Product Customization on Mobile Devices – If you don’t want to give customization feature on mobile devices, then disable this option.
Product Designer Page – When activating the plugin for the first time a new page named “Product Designer” will be automatically created and set as product designer page. If you want to set a different page as designer page, then you can choose it here.
Convert Data URL to Blob – Enable this option to improve performance by converting the canvas Data URL to Blob(Binary Large Object).
General > General > User Restrictions
↑ Back to top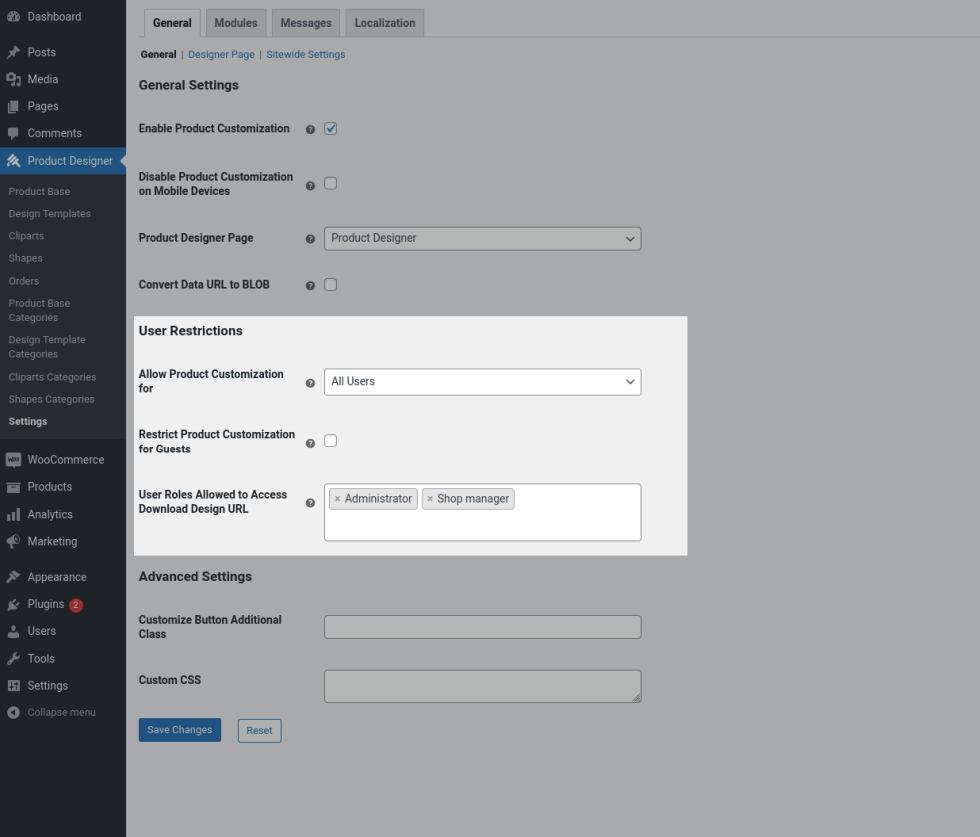
Allow Product Customization for – Use this option to give product customization for specific users or user roles. For excluded users, Customize Product button will be hidden for products and when they try to access Product Designer page, an error will be displayed.
Restrict Product Customization for Guests – Enable this option if you don’t want to allow guest users to customize the product. For guest users, Customize Product button will be displayed, but when they click the button they will be asked to login to the site. Similarly, if they access the product designer page, they will be asked to login.
User Roles Allowed to Access Download Design URL – By default users with Administrator and Shop Manager user roles(in addition to the user who place the order) will be allowed to access the “Download Design” link(which when clicked customer design will be loaded in product designer page). If you want to add or remove user roles to give access, then update it in this option.
General > General > Advanced Settings
↑ Back to top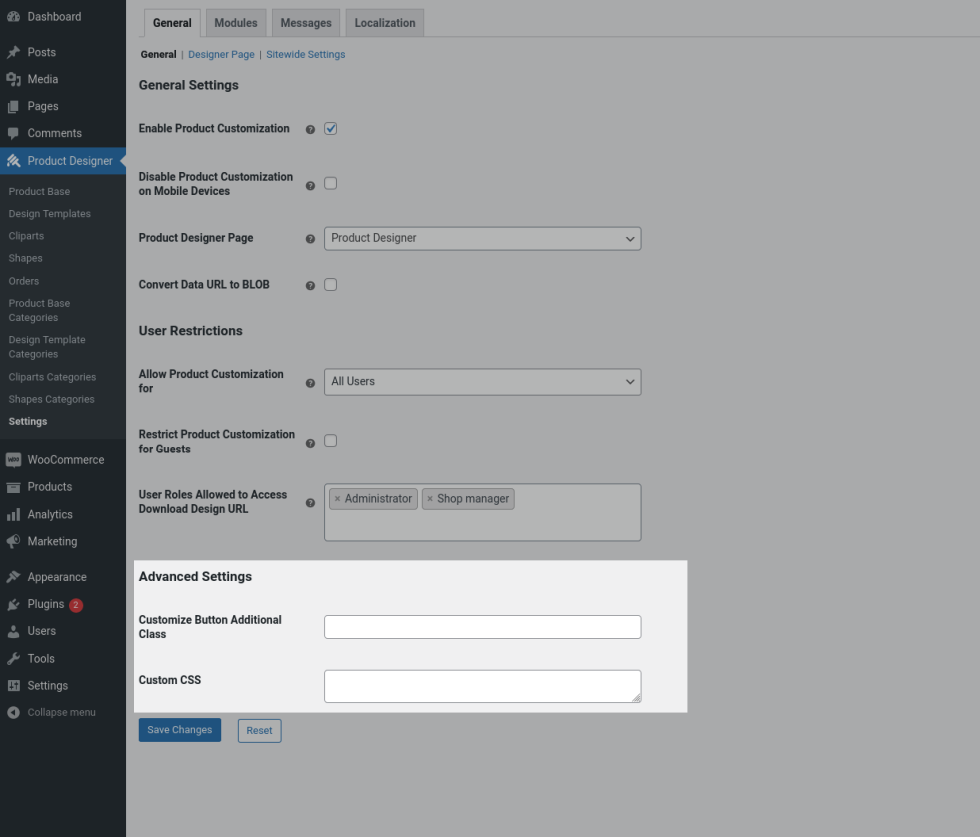
Customize Button Additional Class – If you are using any additional class for customize button, then enter the class name here.
Custom CSS – If you want to add any Custom CSS, then add it here.
General > Designer Page > Page Settings
↑ Back to top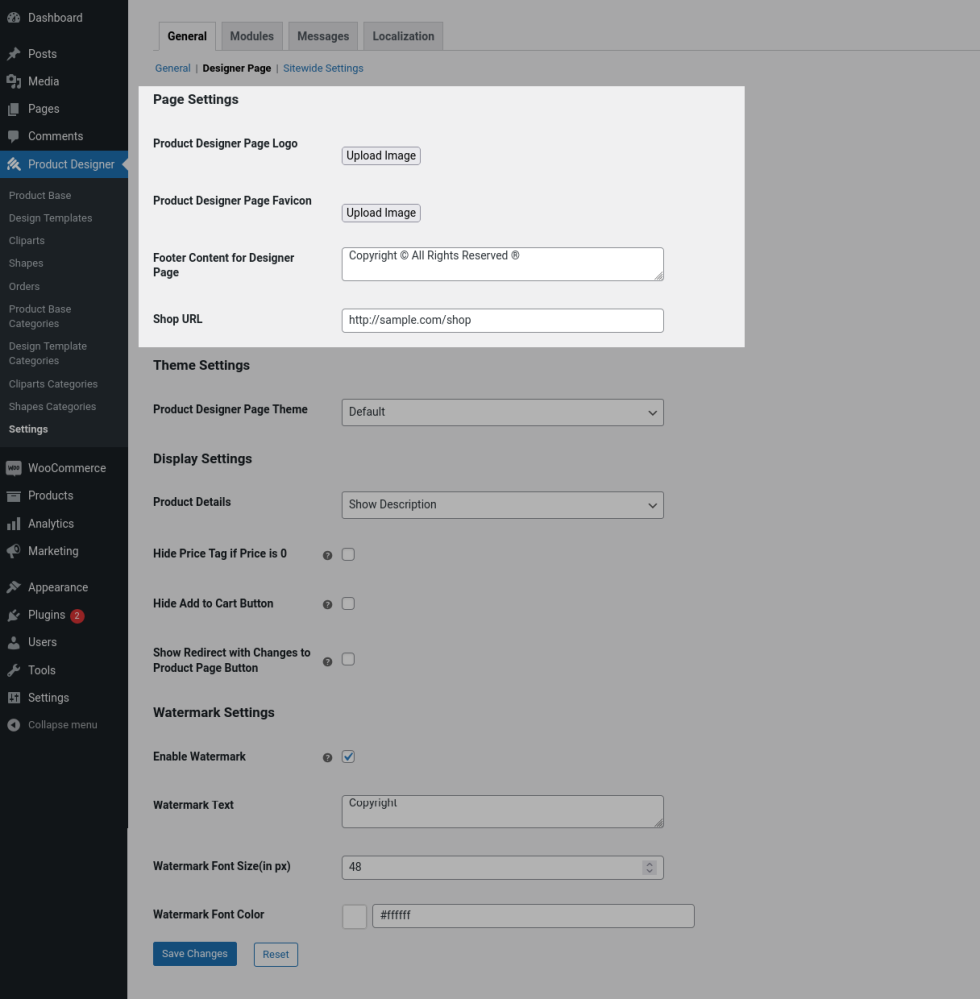
Show Header & Footer – Select “From Theme” option to apply your theme’s header & footer for product designer page. By choosing this, designer page layout will match up with other pages.
Product Designer Page Logo – To add a logo to the product designer page, click “Upload Image” button and select the logo.
Product Designer Page Favicon – To add a favicon to the product designer page, click “Upload Image” button and select the icon.
Footer Content for Designer Page – To add a footer content in the product designer page, give the content here.
Shop URL – The shop page URL has to be given here. Users will be redirected to this URL when they click “Back to Shop” button in designer page.
General > Designer Page > Theme Settings
↑ Back to topProduct Designer Page Theme – Select the theme from the list of available themes(default, Amazon, Basic, Chubby, Github, Material) to apply predefined color options to product designer page or select Custom to choose your own colors. Note: Only “default” theme is supported for mobile devices.
General > Designer Page > Display Settings
↑ Back to top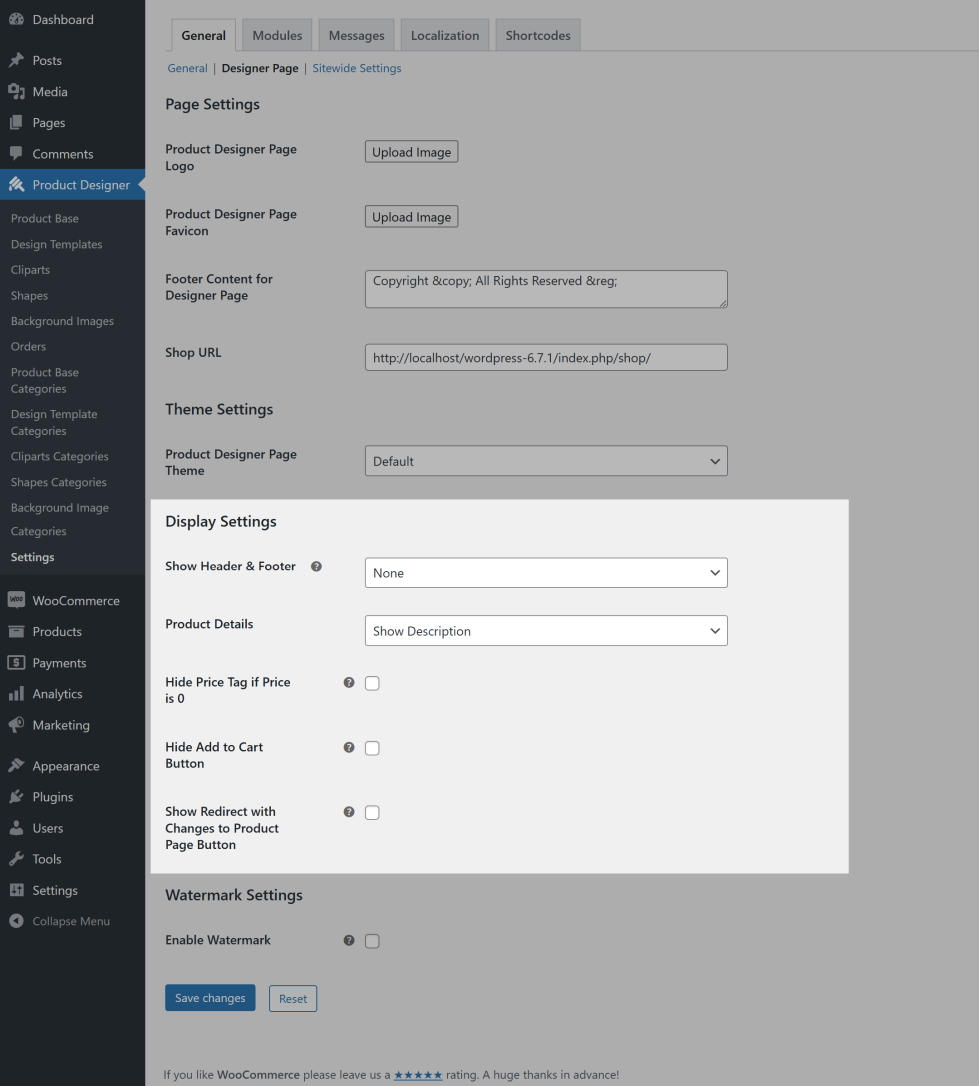
Product Details – Select “Show Description” if you want to show the product description in designer page or select “Show Short Description” if you want to show the product short description in designer page or select “Hide” if you don’t want to show and product details in designer page.
Hide Price Tag if Price is 0 – Price tag will be displayed near every object(images, cliparts, text, templates, shapes) and views. If you want to hide the tag when the price is 0, then enable this option.
Hide Add to Cart Button – If you don’t want the customers to add the product to cart directly from product designer page, then enable this option.
Show Redirect with Changes to Product Page – If you want to allow customers to redirect back to product page with their customization, then enable this option so that “Redirect with Changes to Product Page” button will be displayed which when clicked, they will be redirect to product page and they can see a link(displayed as “+Designing Price: $xx”) in single product page which when hovered, they can see their design.
General > Designer Page > Watermark Settings
↑ Back to top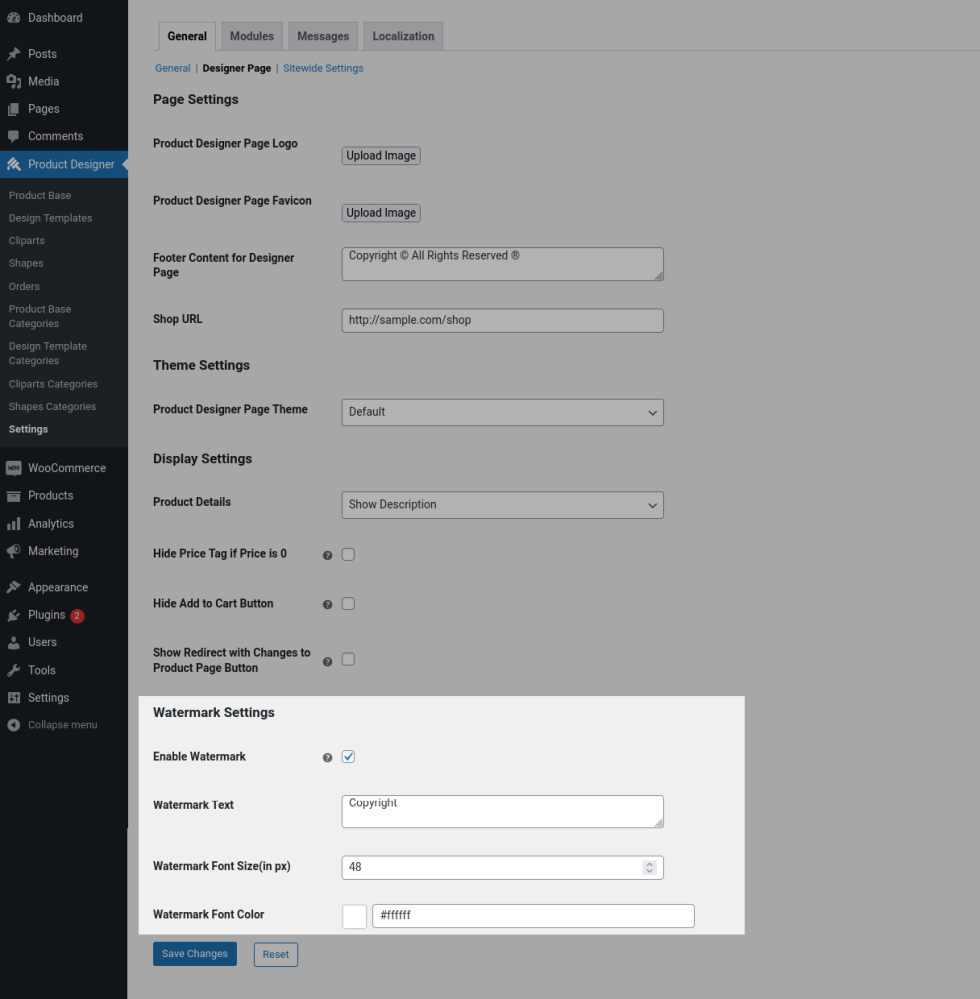
Enable Watermark – Enable this option if you want to apply watermark to customer’s design if they Download/Print their design before placing the order.
Watermark Text – Enter the watermark content here.
Watermark Font Size(in px) – Set the font size of the watermark text here.
Watermark Font Color – Choose the font color of the watermark text here.
General > Designer Page > Sitewide Settings > Single Product Page Settings
↑ Back to top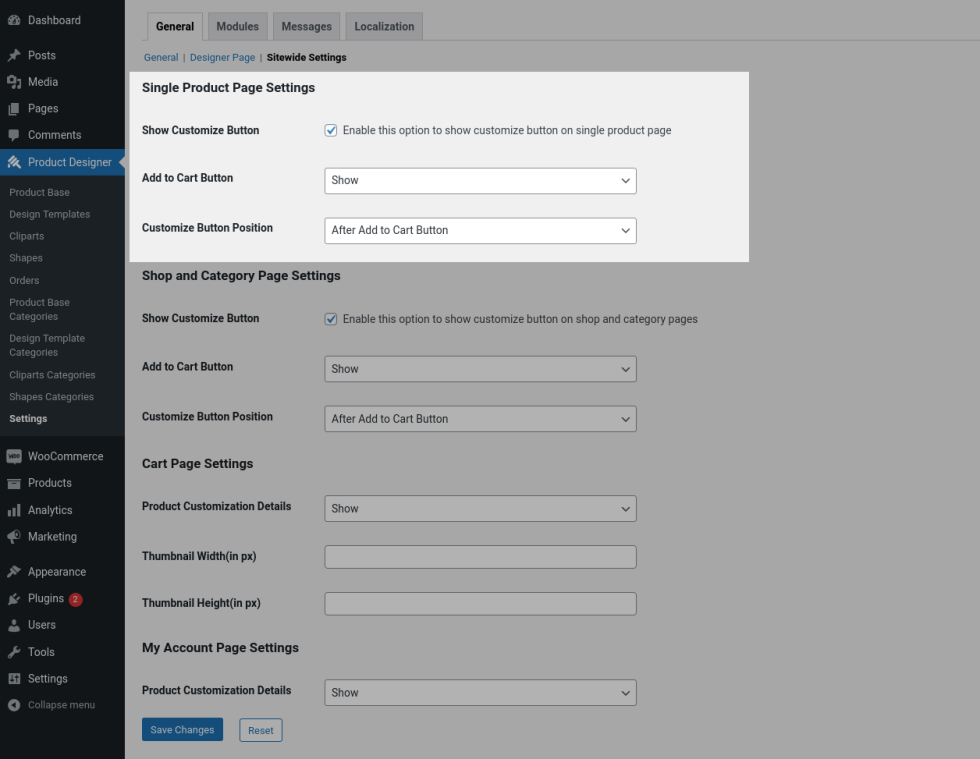
Show Customize Button – Enable this option to show “Customize Product” button on single product pages if the product is linked with any product base.
Add to Cart Button – For products linked with product bases, if you don’t want the customer to add the product to cart before customization from single product page, then select “Hide” in this option.
Customize Button Position – Select the position to display “Customize Product” button on single product page using the available position options.
General > Designer Page > Sitewide Settings > Shop and Category Page Settings
↑ Back to top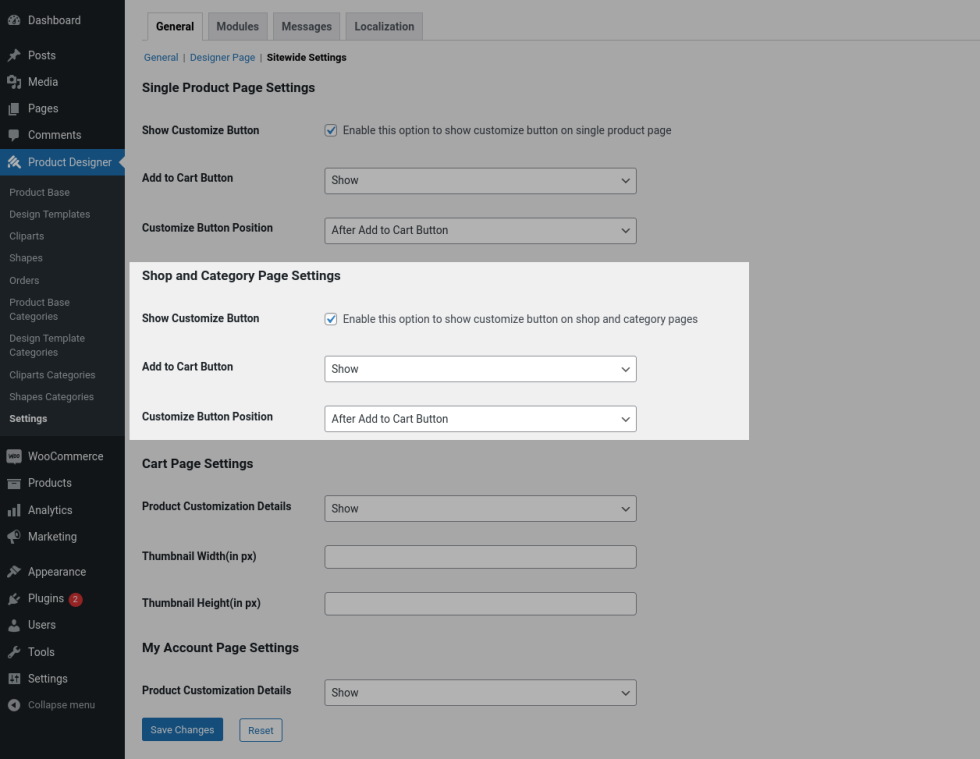
Show Customize Button – Enable this option to show “Customize Product” button on shop and category pages if the product is linked with any product base.
Add to Cart Button – For products linked with product bases, if you don’t want the customer to add the product to cart before customization from shop and category pages, then select “Hide” in this option.
Customize Button Position – Select the position to display “Customize Product” button on shop and category pages using the available position options.
General > Designer Page > Sitewide Settings > Cart Page Settings
↑ Back to top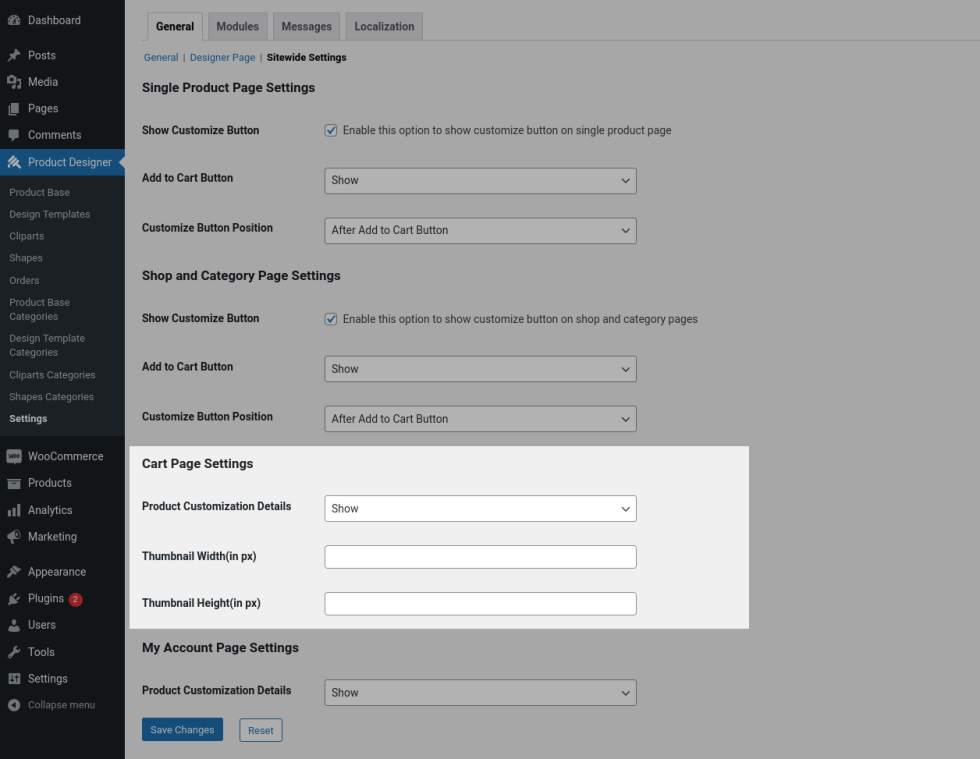
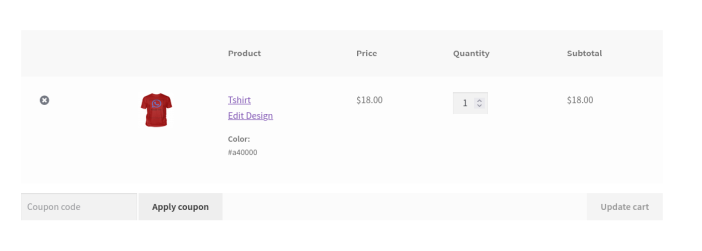
Product Customization Details – To show the product customization details in cart page and allow the customers to edit their design, select “Show” in this option so that “Edit Design” hyperlink will be displayed below the product name in cart and checkout pages which when clicked customer will be redirected back to product designer page where they can edit their design.
Thumbnail Width(in px) – Set the thumbnail image width here.
Thumbnail Height(in px) – Set the thumbnail image height here.
General > Designer Page > Sitewide Settings > My Account Page Settings
↑ Back to top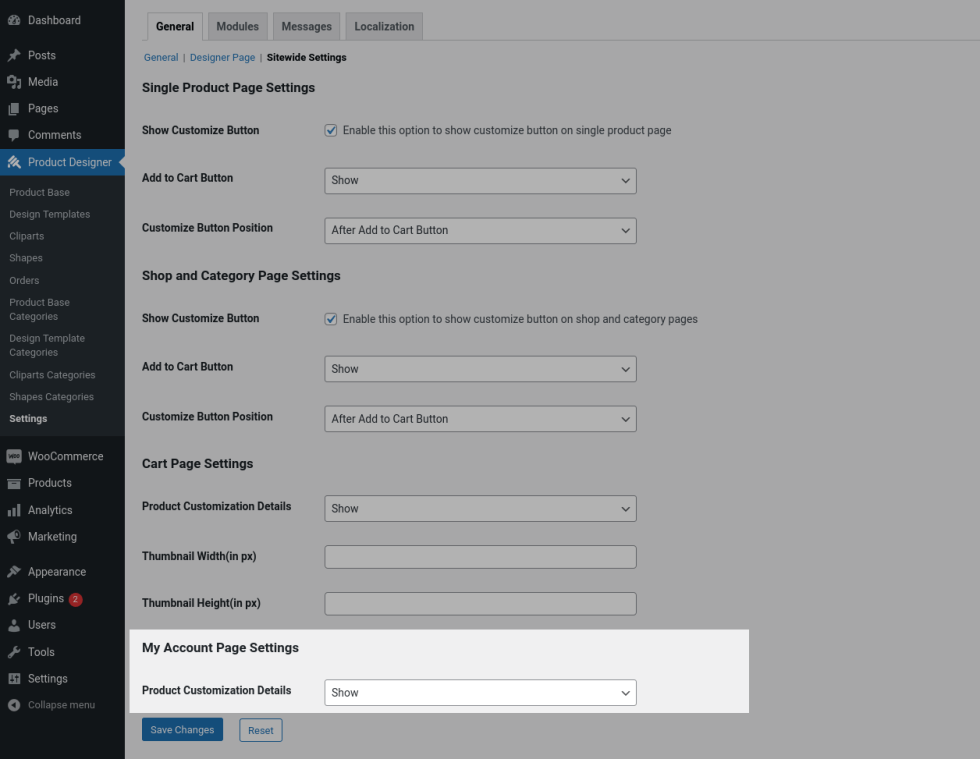
Product Customization Details – If you want to show “Download Design” link in the Orders section in customer’s My Account Page, select “Show” in this option.
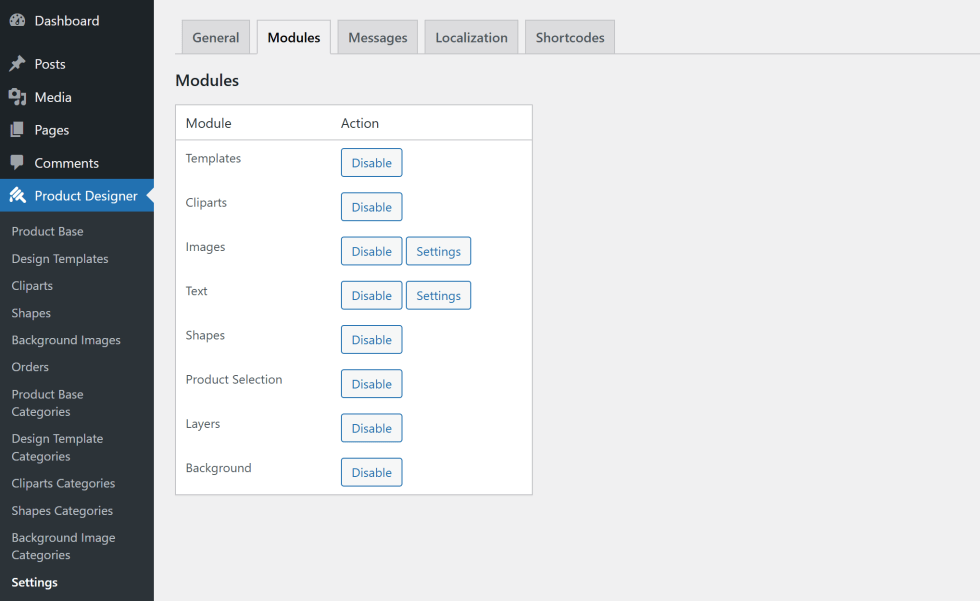
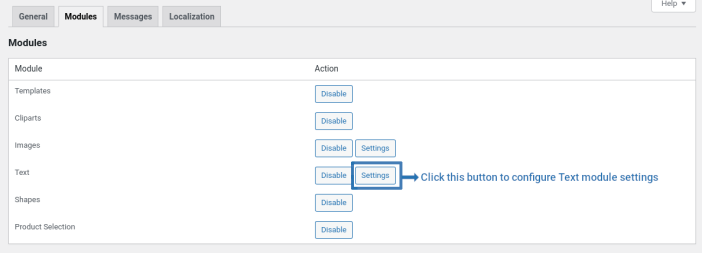
Product Designer > Settings > Modules
↑ Back to topTo show/hide a specific module in product designer page, click the Enable/Disable button on each module as per your requirement.
Modules > Image > Settings
↑ Back to topClick the Settings button near “Image” module to configure Image Settings.

Modules > Image > Settings > Image Settings
↑ Back to top
Force Users to Login to Upload Images – Select “Yes” if you want the guest users to login in order to upload an image to their design.
Image Formats Users can Upload – By default, the plugin support png, jpeg, jpg, gif, pdf formats for image uploading. Leave this field empty to support all these formats. If you want to allow only specific formats for image uploading, then enter the file formats you want to support.
Image Minimum Size(in kb) – Set the minimum file size of the image users can upload. Leave the field empty to don’t give any minimum size restriction.
Image Maximum Size(in kb) – Set the maximum file size of the image users can upload. Leave the field empty to don’t give any maximum size restriction.
Minimum Dimension – Set the minimum image dimension users can upload.
Maximum Dimension – Set the maximum image dimension users can upload.
Modules > Image > Settings > Fee Settings
↑ Back to top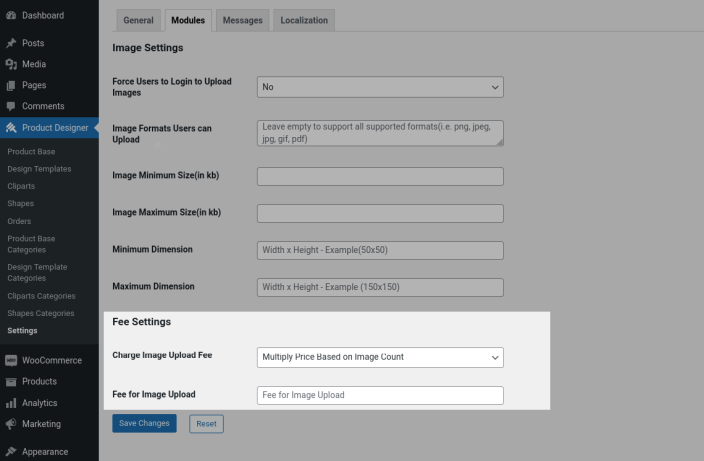
Charge Image Upload Fee – When “Multiply Price Based on Image Count” option is selected, fee will be automatically increased whenever a new image is uploaded to the design. When “Fixed Price for Whole Product” option is selected, only the fixed price will be charged irrespective of number of images added to the design.
Fee for Image Upload – Set the price for adding images to the design in this field. If you don’t want to charge any fee for image upload, then leave this field empty.
Modules > Image > Settings
↑ Back to topClick the Settings button near “Text” module to configure Text Settings.
Modules > Image > Settings > Text Settings
↑ Back to top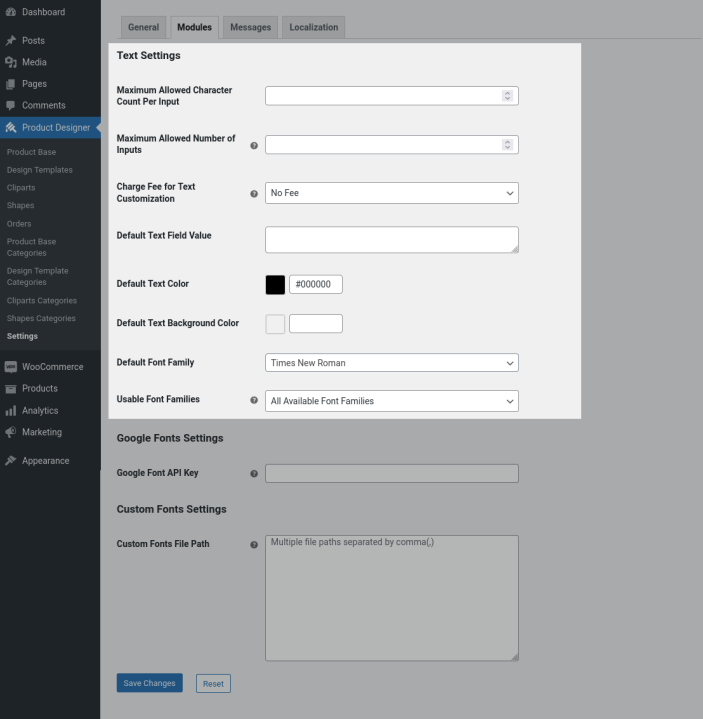
Maximum Allowed Character Count Per Input – While adding Text to their design, customers won’t be allowed to add more than set number of characters at once.
Maximum Allowed Number of Inputs – While adding Text to their design, customers won’t be allowed to add more than set number of times which you have set here. If the limit is reached, then they have to delete an added input from their design and add the text again.
Charge Fee for Text Customization – If you want to charge a fixed fee irrespective of the character count, then select “Fixed Fee”. If you want to charge a fixed for specific number of characters and multiply price based on character count, then select “Fee for n Number of Characters”. If you don’t want to charge any fee for Text customization, then select “No Fee”.
Number of Characters – If you have selected “Fee for n Numbers of Characters” in the previous option, then set the character count to charge the fee in this field.
Fee – Set the fee for text customization in this field.
Default Text Field Value – If you want to give any default text content in Text field, then give the content here.
Default Text Color – For text color, set the default color here.
Default Text Background Color – For text background color, set the default background color here.
Default Font Family – Select the font family to be applied as default here.
Usable Font Families – By default all the available font families will be available for text customization. If you want to give only specific font families for text customization, then choose “Selected Font Families” in this option.
Select Font Families – If you have chosen “Selected Font Families” in the previous option, then select the font family from the list of available font families.
Modules > Image > Settings > Google Fonts Settings

Google Font API Key – Fill your Google Font API Key in this field so that list of font families available in Google Fonts will be available for Text customization.
Modules > Text > Settings > Custom Fonts Settings
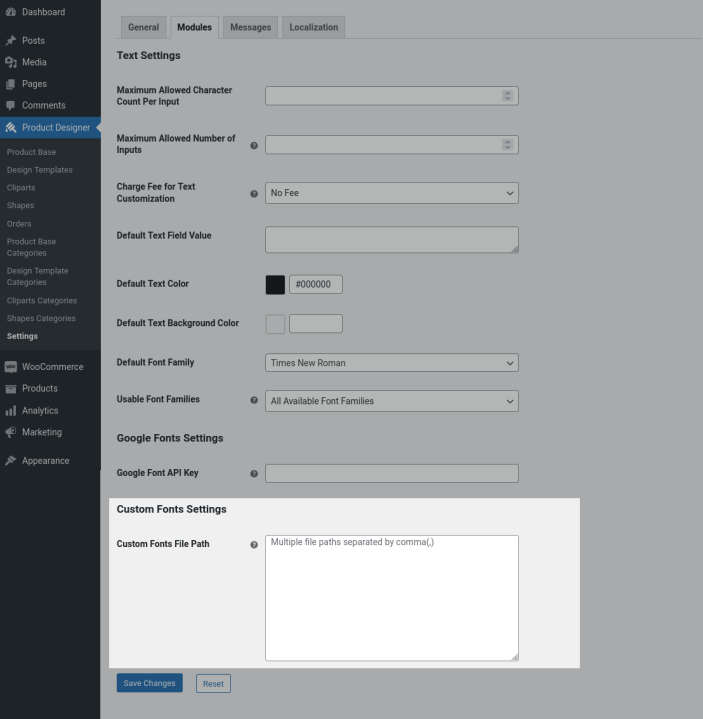
Custom Fonts File Path – If you want to add your custom fonts for text customization, then copy the custom font file path and paste it here.
Steps for getting custom font file path:
- Go to “Media > Add New Media File”.
- Click “Select Files” button.
- Select the custom font files which you want to add.
- Click “Copy URL to Clipboard” button.
Settings > Messages
↑ Back to topThe messages displayed in product designer page can be customized in this section.
Settings > Localization
↑ Back to topThe labels displayed in frontend can be customized in this section.
Usage
↑ Back to topCustomer Designing the Product and Placing the Order
↑ Back to top- Click “Customize Product” button on single product/shop/category page or else directly go to Product Designer Page.
- If “Customize Product” button is clicked, you will be redirected to Product Designer Page with the product base loaded which was linked with the selected product.
- If Product Designer page is accessed directly, then you will be asked to select the Product Base and Product.
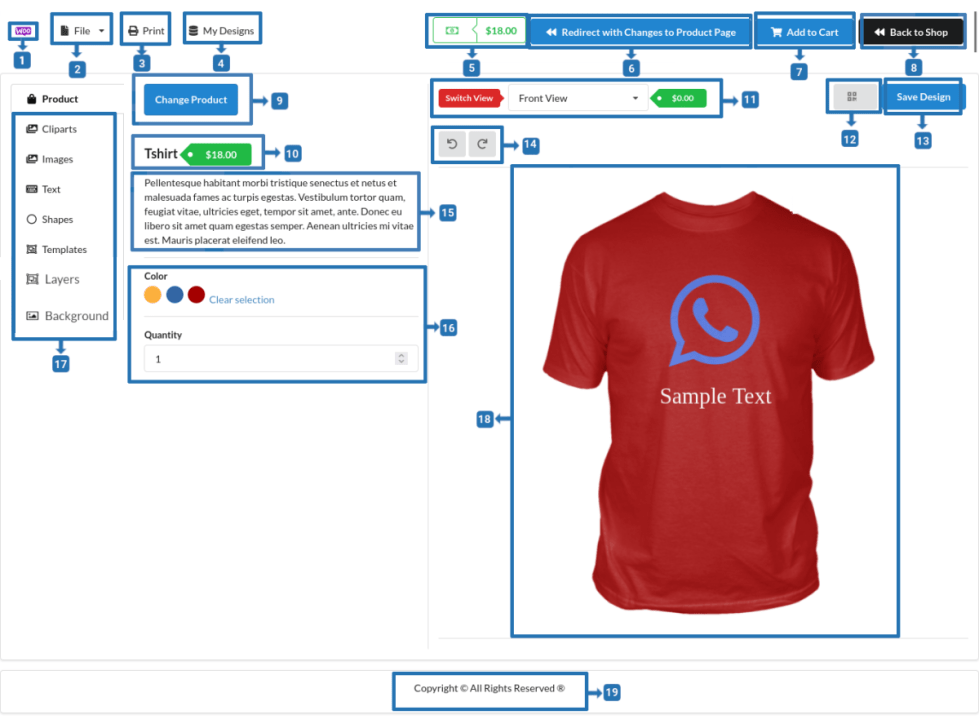
1 – Logo which you have uploaded in “Product Designer > Settings > General > Designer Page > Page Settings > Product Designer Page Logo”. Clicking on this logo will redirect you to Home page of the site.
2 – Design file can be exported as .txt file by Exporting/Exporting as a Template from this menu.
3 – Menu to Print/Download the design.
4 – Customer saved designs can be seen or deleted from this menu.
5 – Price of the product including product price, attribute price, design price, quantity can be displayed here.
6 – After customizing the product, if customer wants to go to simple product page, then they have to click this button. To hide this button, go to “Product Designer > Settings > General > Designer Page > Page Settings > Display Settings > Show Redirect with Changes to Product Page Button” and disable the checkbox.
7 – When this button is clicked, customized product will be added to the cart. To hide this button, go to “Product Designer > Settings > General > Designer Page > Display Settings > Hide Add to Cart Button” and disable the checkbox.
8 – When this button is clicked, customer will be redirected to Shop page. The customization which they have done will be lost when this button is clicked.
9 – To design another product, customers have to click this button and choose the new Product Base and Product.
10 – Product name along with the price tag(Regular/Sale Price of the product).
11 – If the product base is created with multiple views, then switch the view here.
12 – For adding QR Code to your design, click “Generate QR Code” button and fill the content which you want to give to the QR code in “QR Input Text” option.
13 – After designing your product, if you want to save the design for future purpose, then click on “Save Design” button. You can access your saved designs from “My Designs” menu.
14 – Undo and Redo buttons.
15 – Description/Short description of the product which can be controlled in “Product Designer > Settings > General > Designer Page > Display Settings > Product Details”.
16 – Attribute Area where the customers can select the product attributes as per their requirement.
17 – Design the product with the help of these objects. To show/hide a specific object, go to “Product Designer > Settings > Modules” and enable/disable the module as per your requirement.
18 – Design Area. The objects selected by the customer can be seen in this area where they can edit and design as per their requirement.
19 – Product Designer Page footer content which can be customized in “Product Designer > Settings > General > Designer Page > Page Settings > Footer Content for Designer Page”.
- After completing your design, to add the product to cart click “Add to Cart” button or to go to product page click “Redirect with Changes to Product Page” button.
- Once the product is added to cart, you can see “Edit Design” hyperlink below the product name in cart and checkout pages which when clicked you will be redirected to product designer page again where you can edit your design or update the attribute values if needed.
- Finally place the order.
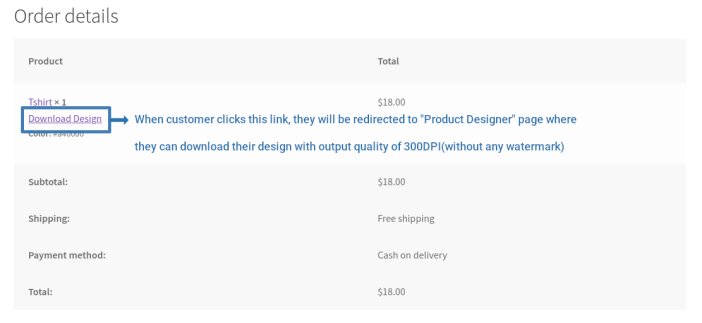
- In Thank You page, below the product name you can find “Download Design” link which when clicked you will be redirected to Product Designer page where you can Download/Print your designs without any watermark and with output quality of 300DPI.
Managing Product Designer Orders and Printing Designs
↑ Back to topOnce Customer place the orders with product customization, you can see it in “Product Designer > Orders”.
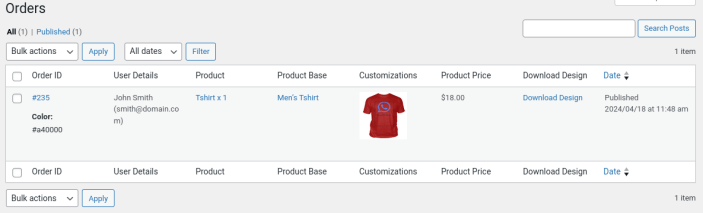
- Click the “Download Design” link for the respective order so that you will be redirected to frontend product designer page with customer loaded design and attributes which they have chosen.
- On the top left of the designer page, go to “Print” menu so that you can Download/Print the design.
- This output quality of this print will be in 300DPI.
Translation
↑ Back to topProduct Designer for WooCommerce is translation ready, meaning you can edit the po files by which you can translate the text to any language. Steps to perform the translation are as follows. For example, a translation to French.
- Download and install Poedit
- Open the file product-designer-for-woocommerce > languages > product-designer-for-woocommerce.pot using Poedit.
- Create a new translation file by clicking Create new translation button.
- Choose the Source text and set its corresponding French text in Translation Text Area.
- Save the changes.
- Save the file name as product-designer-for-woocommerce-fr_FR.po.
- If you are using WordPress Version 3.9.13 or below, then in wp-config.php define the WPLANG as French. Syntax is define(‘WPLANG’, ‘fr_FR’);
- If you are using WordPress Version 4.0 or above, then go to WordPress dashboard > Settings > General and select the Site Language as French.
Questions and Feedback
↑ Back to topHave a question before you buy? Please fill out this pre-sales form.
Already purchased and need some assistance? Get in touch with us via the Help Desk.
FAQ
↑ Back to topQ: Designing is not working on mobile devices. Why?
As of now, designing on mobile devices is supported only on the “Default” theme. If you have selected any different themes in “Product Designer > Settings > General > Product Designer Page Theme Settings”, then designing won’t work.