Product Input Fields for WooCommerce Pro plugin is most useful for businesses that sell customised products. This plugin allows your customers to provide custom information or required details, before adding the product to their cart. These input fields will appear on product’s single page when you enable the settings.
Installation
↑ Back to topTo start using a product from WooCommerce.com, you can use the “Add to store” functionality on the order confirmation page or the My subscriptions section in your account.
- Navigate to My subscriptions.
- Find the Add to store button next to the product you’re planning to install.
- Follow the instructions on the screen, and the product will be automatically added to your store.
Alternative options and more information at:
Managing WooCommerce.com subscriptions.
Setup and Configuration
↑ Back to topGeneral Settings
↑ Back to topTo go to General Settings page, go to WooCommerce -> Settings -> Product Input Fields -> General link. Default General settings page will appear as shown below:
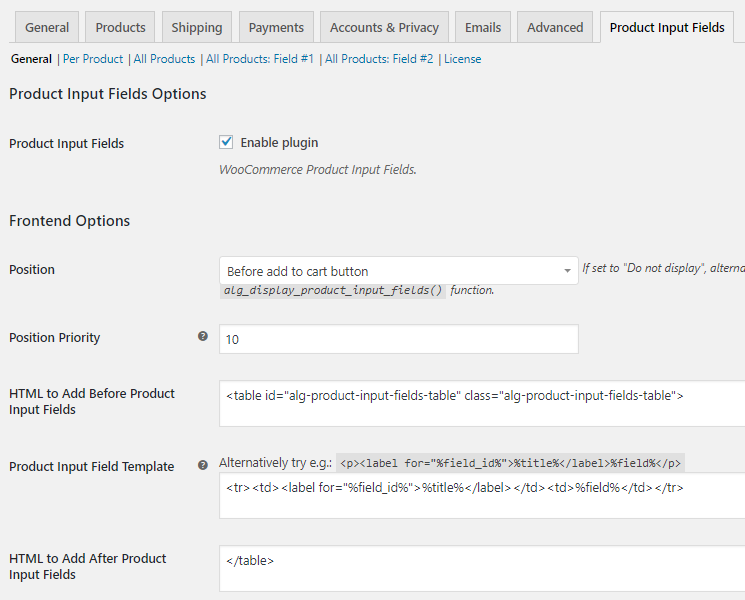
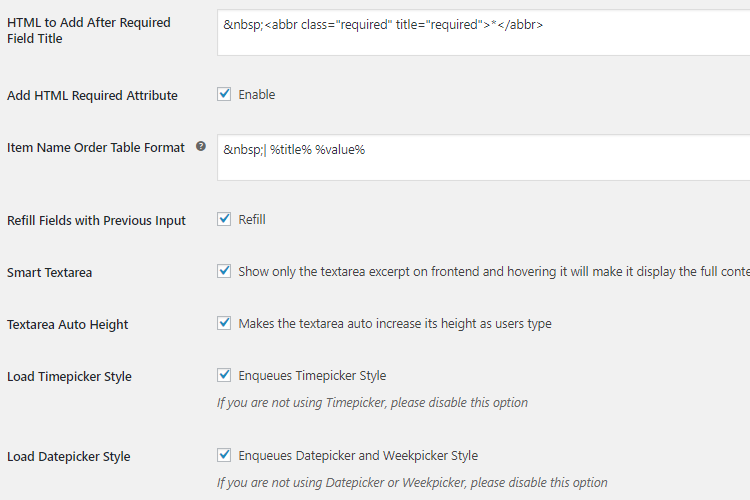
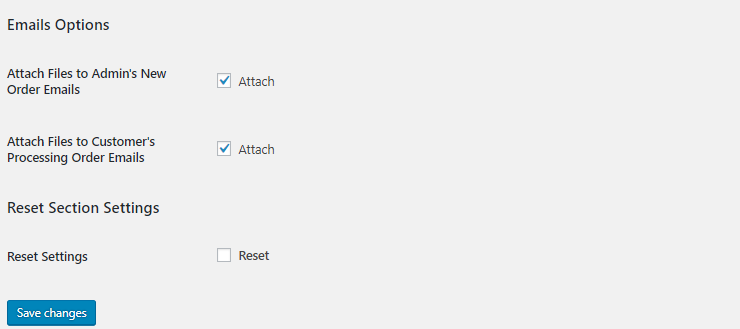
This page consists of 4 sections:
- Product Input Fields Options
- Frontend Options
- Emails Options
- Reset Section Settings
Product Input Fields Options
↑ Back to topThe Product Input Fields setting allows you to enable the plugin. You can then add input fields options that will appear on the front end for customers to add details. Enable plugin checkbox of Product Input Fields is ticked by default.

When you untick the checkbox, Product Input Fields setting will be disabled and hence, no settings of Product Input Fields for WooCommerce Pro plugin will work.
Frontend Options
↑ Back to topThe settings under Frontend Options will allow you to set front end display of product input fields on single product’s page. There are various options under this section, so let us understand each of them separately.
Position
This setting will allow you to select position on the singe product page to display the product input field/s. There are 3 options in Position dropdown namely After add to cart button, Before add to cart button and Do not display.
When you select After add to cart button option, the product input field which is selected in the back end will appear on the single product’s page after the Add to cart button.

For instance, when you have selected product input field as Text and customer selects product 3 boxes on the front end, then Text input field will be displayed after the Add to cart button.
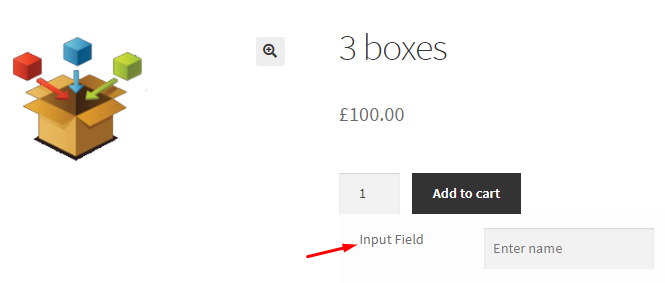
Now when you select Before add to cart button option, then Text input field will appear before the Add to cart button on the single product page of 3 boxes product.
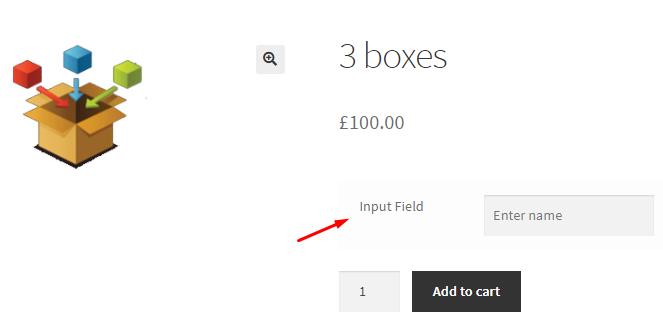
When you select the 3rd option that is Do not display from the drop down, the Text input field will not appear on the single product page.
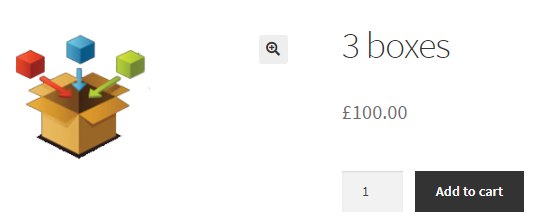
Note – If this option is set to Do not display, alternatively you can use [alg_display_product_input_fields] shortcode or PHP alg_display_product_input_fields() function.
By default, Position setting is set to Before add to cart button option.
Position Priority
In this setting you can choose the priority for displaying product input field/s on the front end. By default, Position Priority setting is set to 10.

Say you add product input field Select in the back end with title Club Name, then Club Name input field will appear on the front end as shown below:
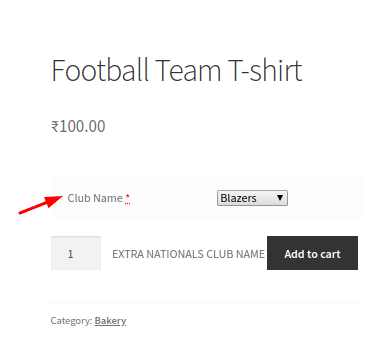
This is for the default setting, but if you want to change the position of an input field, you can change it in Position priority setting. Say you want to display text ‘EXTRA NATIONALS CLUB NAME’ before the product input field. Hence you will need to change the position of the input field. So let us set the position priority to 20.
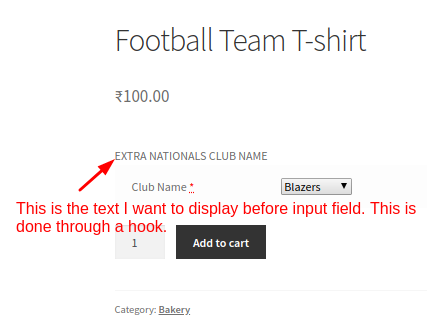
Hence, by changing the Priority position value to 20, the text can be displayed after the price and before the Club Name input field.
Note – Position priority setting will be ignored if Do not display option is selected for Position setting.
HTML to Add Before Product Input Fields
The HTML tag added in HTML to Add Before Product Input Fields setting, will display the background of the product input field. By default, it is set to <table id=”alg-product-input-fields-table” class=”alg-product-input-fields-table”>. This shows that a table format is selected to display the input field/s.

So on the front end, a table with grey background will appear. Say for instance, we add 2 input fields i.e. Text and File, then it will appear as shown below:
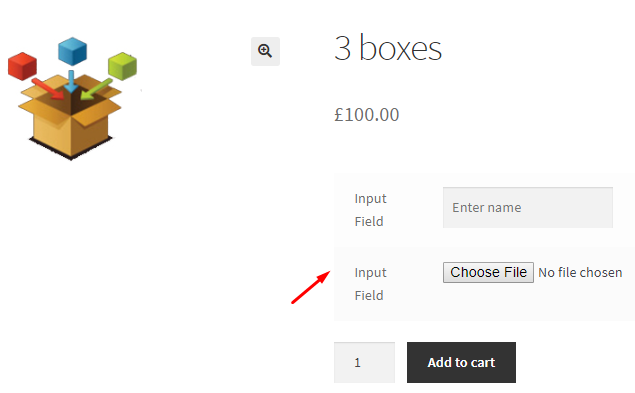
You can change the backgroud of the input fields as per the requirements by changing the HTML tag in this setting.
Product Input Field Template
This setting allows you to add HTML tag for displaying the input fields details. For instance, if Text is selected then this setting will allow you to decide how will the Text box appear or if File option is selected then it will help you to decide how the Choose File button and its Text will appear etc.
By default it is set to <tr><td><label for=”%field_id%”>%title%</label></td><td>%field%</td></tr>.

Here mergecodes like %field_id%, %title%, %field% are replaced by its actual values on the front end.
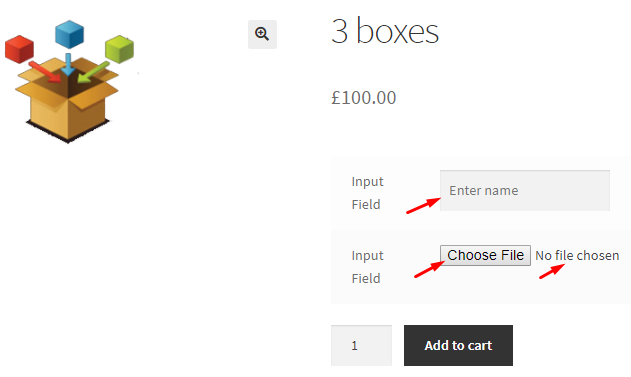
Hence, it shows the Text box for Text input field and Choose File button with text No file chosen for File input field.
Alternatively, you can also use <p><label for=”%field_id%”>%title%</label>%field%</p> for this setting.
HTML to Add After Product Input Fields
This HTML tag is used to close the tag in HTML to Add Before Product Input Fields setting. By default, it is set to </table>.

This shows that the table created for input field is closed using the </table> tag.
HTML to Add After Required Field Title
When you enable the Is Required option under All Product: Field #1 link, the product input field becomes mandatory. So to set the HTML tag for Required Field, you can set it using HTML to Add After Required Field Title.

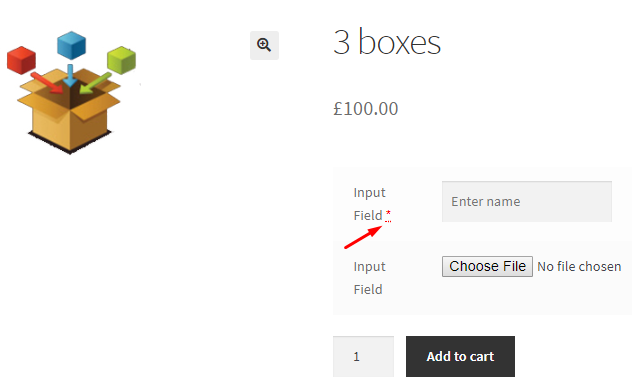
By default, <abbr class=”required” title=”required”>*</abbr> tag is set. This means there will be an ‘*‘ sign next to the Required Field title as shown below:
Add HTML Required Attribute
This setting allows you to add or remove the ‘*‘ sign on the front end. By default, the Enable checkbox is ticked.

When you disable the Add HTML Required Attribute setting, the ‘*‘ sign will not be available for display on the front end when Is Required setting is enabled for the product input field.
Item Name Order Table Format
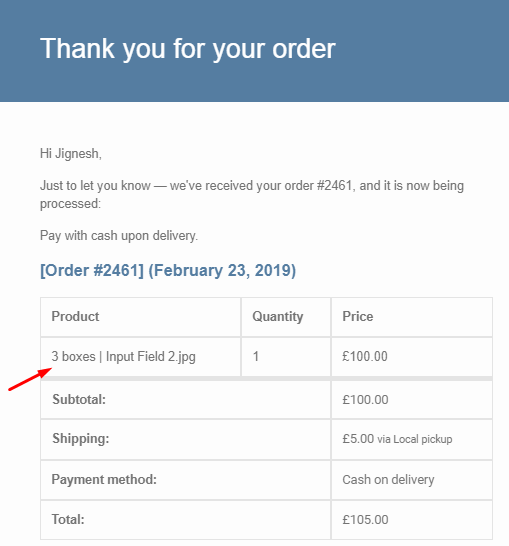
This setting will allow you to set the format for displaying Item name with input field details on Thank you page and Confirmation Email. The default HTML tag for Item Name Order Table Format is | %title% %value%.

So this will reflect on the Thank You page as shown below:
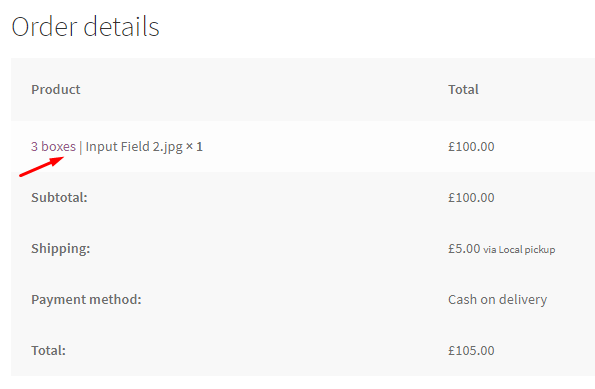
Same will reflect in the Confirmation email sent to the customer.
Refill Fields with Previous Input
This setting will auto display the input value in the product input field which was added previously for the same input field. This is possible when you enable the Refill Fields with Previous Input setting by ticking the Refill checkbox.

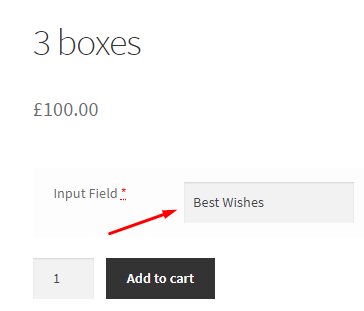
This means, say you had added input value as Best Wishes in the Text input field of product 3 boxes and placed the order. Then if you go to single product page of another product Beads Rakhi which also has Text input field, then the value in the input field will appear as Best Wishes automatically.
The same appears in the input field for product Beads Rakhi:
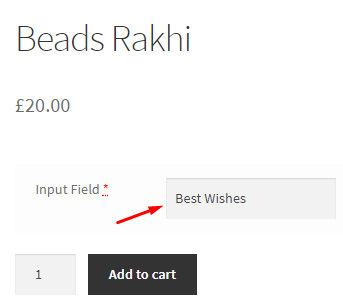
This way, Refill Fields with Previous Input setting enables auto population of previous input value in the input field on the front end. By default, this option is enabled.
Smart Textarea
This setting will allow you to show only the textarea excerpt on the front end when long description is added. By hovering this area, full content gets displayed. By default, Smart Textarea setting is enabled.

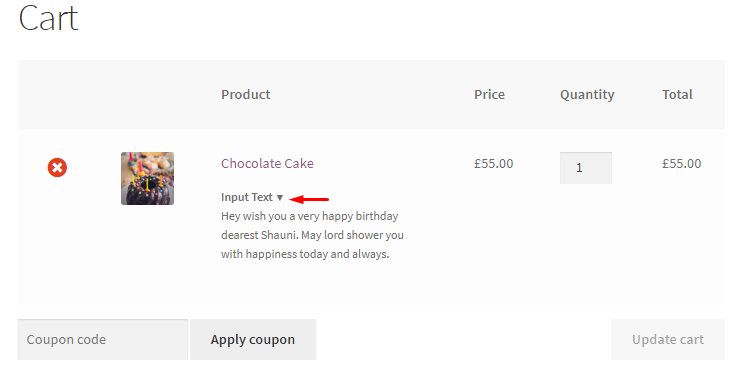
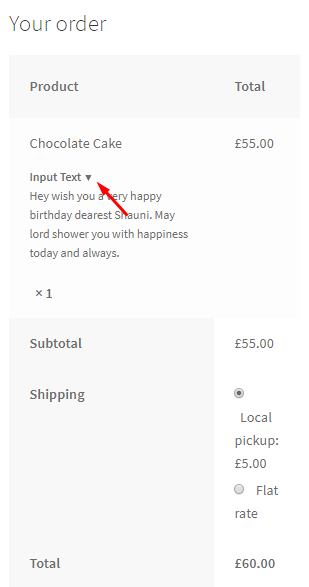
So when you have Textarea input field for product Chocolate Cake and the description exceeds its display area, then the full content added by the customer will appear by hovering it as shown below:
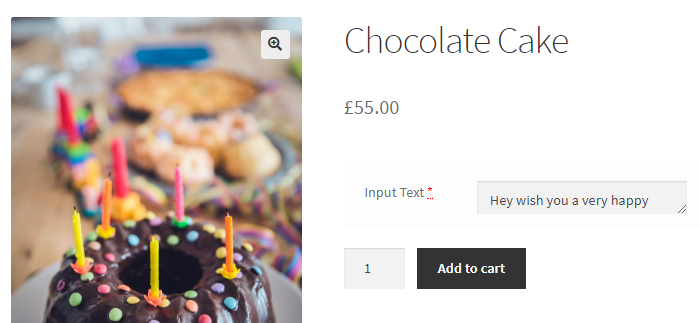
On hovering, full content will be displayed on the Cart and Checkout page.
Textarea Auto Height
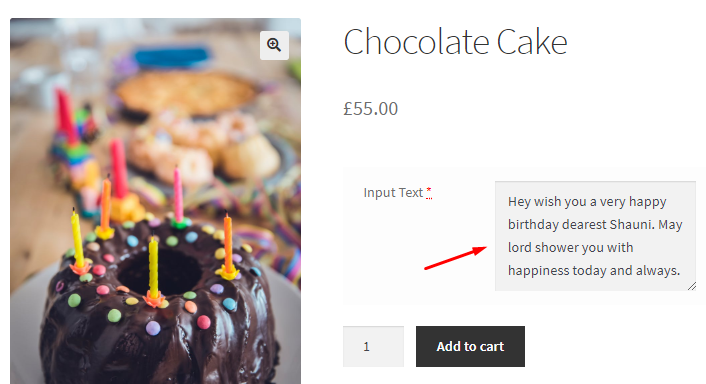
This setting will enable auto adjustment of the height of Textarea input field. This means when you add description which is longer in nature, the height of Textarea will automatically increase and adjust to the text.

Therefore say you added a longer description for product Chocolate Cake, the Textarea will show full contents in the input field with increased height.
Load Timepicker Style
When Load Timepicker Style setting is enabled, the necessary js, css files will be loaded to display the Timepicker on the front end.

This setting is enabled by default. If you untick the Enqueues Timepicker Style checkbox, the Timepicker will not appear on the front end even if it is selected in the backend. Disable this setting if you are not using Timepicker input field.
Load Datepicker Style
The Load Datepicker Style setting is enabled by default and is required to load the necessary js, css files to display the Datepicker and Weekpicker on the front end.

When this setting is disabled by unticking the Enqueues Datepicker and Weekpicker Style checkbox, the Datepicker and Weekpicker will not be displayed on the front end even if it is selected in the backend. Disable this setting if you are not using Datepicker input field.
Email Options
↑ Back to topAttach Files to Admin’s New Order Emails
When this setting is enabled, the file that the customer uploads on the single product page on the front end will appear in the New Order Email sent to the admin. By default, Attach Files to Admin’s New Order Emails setting is enabled.

Say for instance, the customer uploads an image for placing an order for customised cake. Then when this order details are sent to the admin in an email, the file is also shown with these details. This setting will be in effect only if File type input field is selected.
Attach Files to Customer’s Processing Order Emails
When this setting is enabled, the file that the customer uploads on the single product page on the front end will appear in the Processing Order Email sent to the customer. By default, Attach Files to Customer’s Processing Order Emails setting is enabled.

Say you have File input field on the Chocolate Cake single product page and customer uploads a file for customising this cake. When this setting is enabled, the order confirmation sent to the customer will have order details as well as this file in the email.
Reset Section Settings
↑ Back to topThis setting allows you to reset the General settings of this plugin to its default value. To do so, you can tick the Reset checkbox of Reset Settings as shown below:
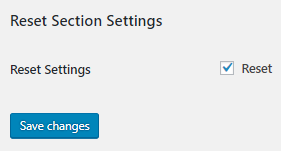
This will make all the settings on the General settings page enabled and set HTML tags to its default values. There will be an impact on the front end when you reset the settings. For instance, if you have changed the HTML tag for Product Input Field Template setting and you reset the General settings then default template will be effective. Hence the appearance of the product input filed will change on the front end.
Additional Settings
↑ Back to topFAQ’s
↑ Back to topView all FAQ’s from here.
Questions & Support
↑ Back to topHave a question before you buy? Please fill out this pre-sales form.

