WooCommerce Size Chart extension enables you to assist your customers to find the right size by display size guide on product pages.
- Download the .zip file from your WooCommerce account.
- Go to: WordPress Admin > Plugins > Add New and Upload Plugin with the file you downloaded with Choose File.
- Install Now and Activate the extension.
More information at
Install and Activate Plugins/Extensions.
Setup and Configuration
Once the plugin is installed and activated, you will notice a new menu item in WordPress Admin panel > Size Chart
.
To create new
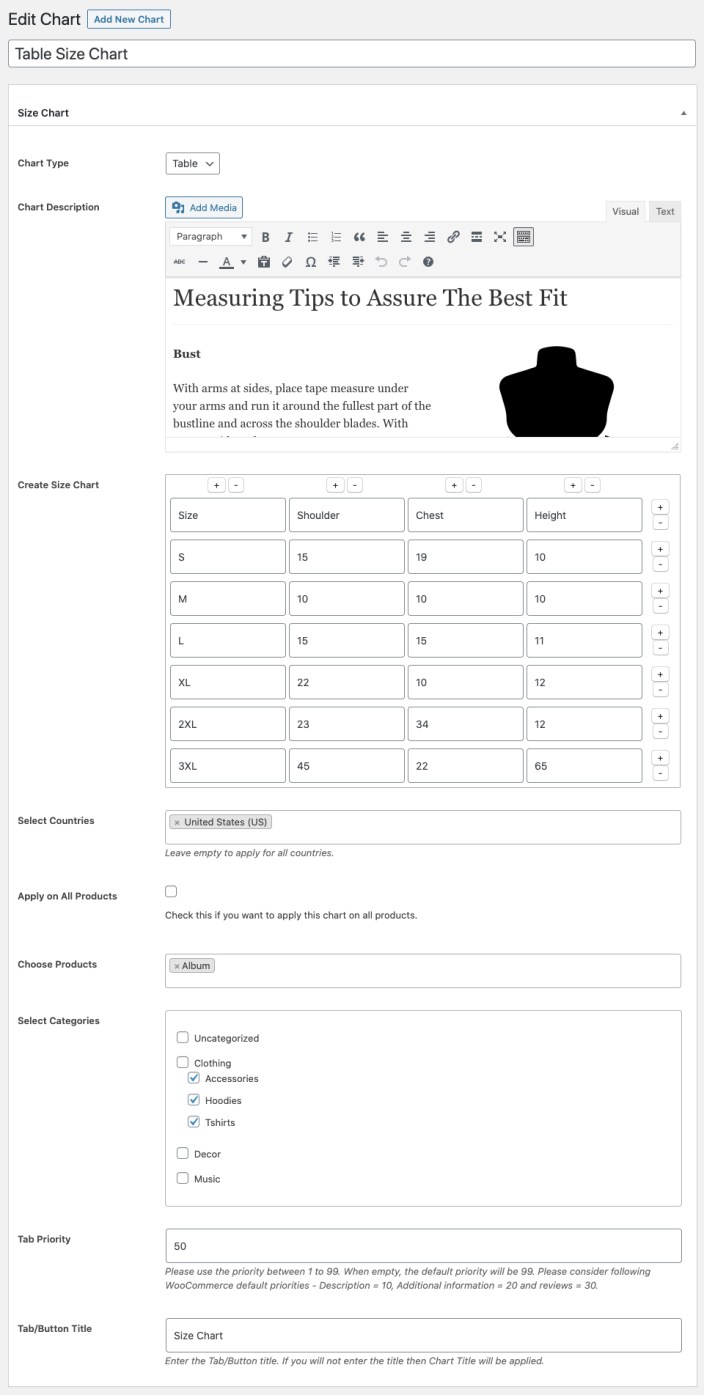
size chart go to Admin panel > Size Chart and click on “Add New”. Here you can add the following details,
- Size Chart title (for future reference)
- Select if you want to add an image size chart or create a new size table
- Add Size chart content (Leave empty if you only want to show size chart only)
- Attach to specific countries (Leave empty to apply on all country)
- Attach to all or relevant products and categories
- Add size tab priority (This is will be used if you have enabled size chart display as tab)
- Add size chart tab/button text

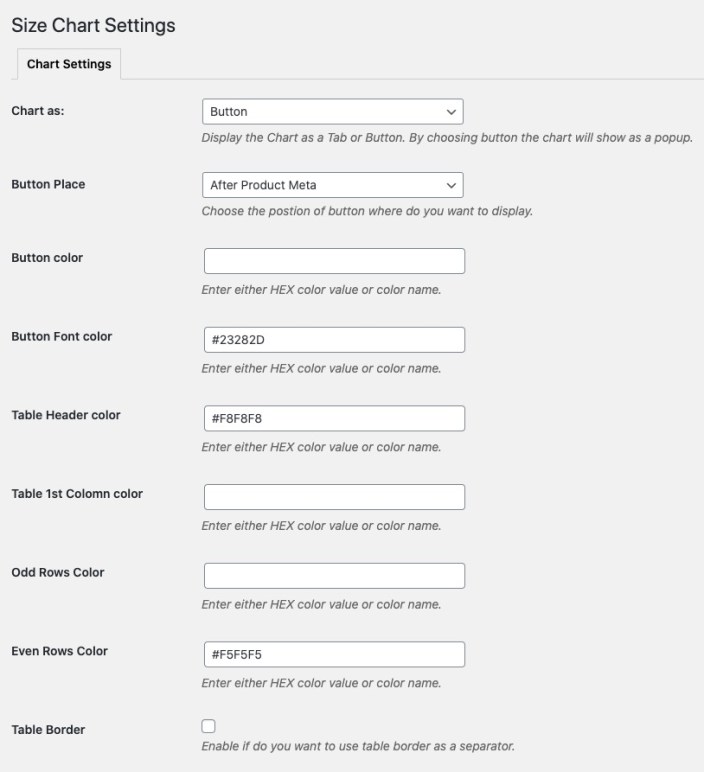
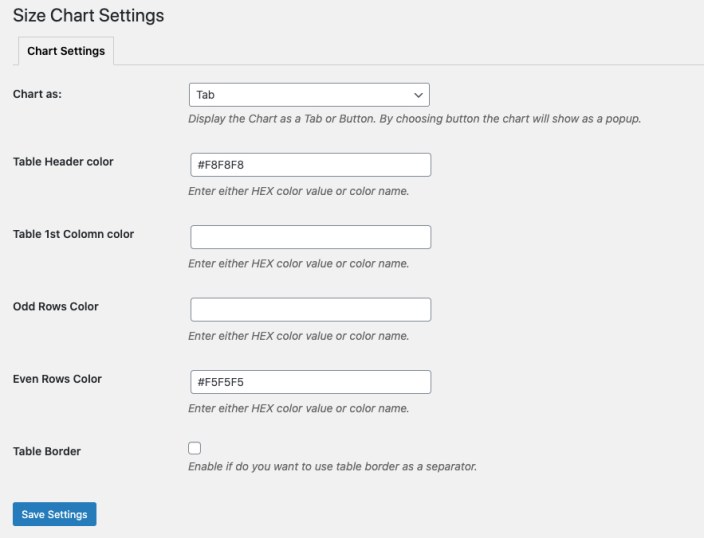
Go to Admin panel > Size Chart and click on “settings” to access the configuration options, here you can choose to display size chart as tab or button. In case of button the size chart will be display in popup.
When you select button from the settings options, all of your size chart will appear in a button > popup form. You can customize the following options here,
- Button placement after price, short description, add to cart or product metas
- Button background color and text color
- Customize table header color (i.e first row)
- First column color
- Odd and even row colors
- Enable/disable table border

When using the size chart tab option you can customize following settings,
- Customize table header color (i.e first row)
- First column color
- Odd and even row colors
- Enable/disable table border


