- Download the .zip file from your WooCommerce account.
- Go to: WordPress Admin > Plugins > Add New and Upload Plugin with the file you downloaded with Choose File.
- Install Now and Activate Plugin.
More information at
Install and Activate Plugins/Extensions.
As soon as the extension has been installed, settings can be found in
WordPress Admin Panel > WooCommerce > Gift Wrap. The extension can be configured using the following steps:
1) Create Gift Wrapper Designs
2) Create rules to enable the gift wrap feature
3) Customize settings
4) View Dashboard Reports
You can create multiple gift wrapper designs by occasion and their types per your business needs.
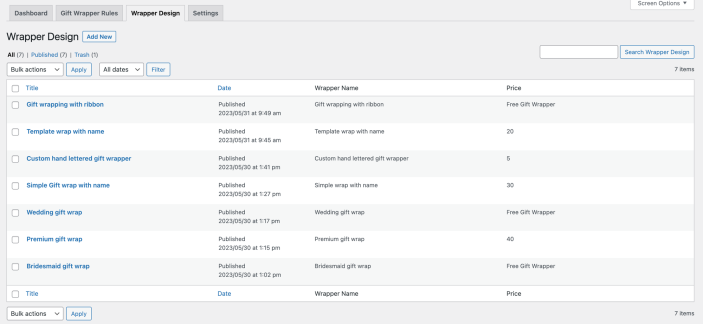
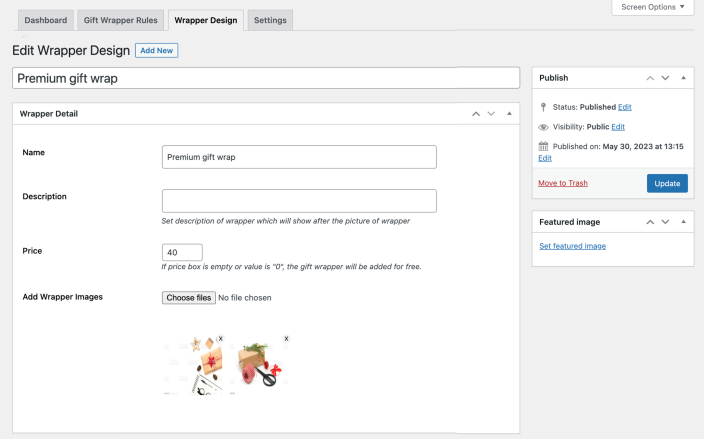
While creating a new gift wrap design you can,
- Add gift wrap name and description
- Attach multiple images to each design
- Set a fixed price or leave it empty to keep it free
- If you have added multiple images, you can upload a featured image too that will appear as the first image for this wrapper design on the frontend for customers
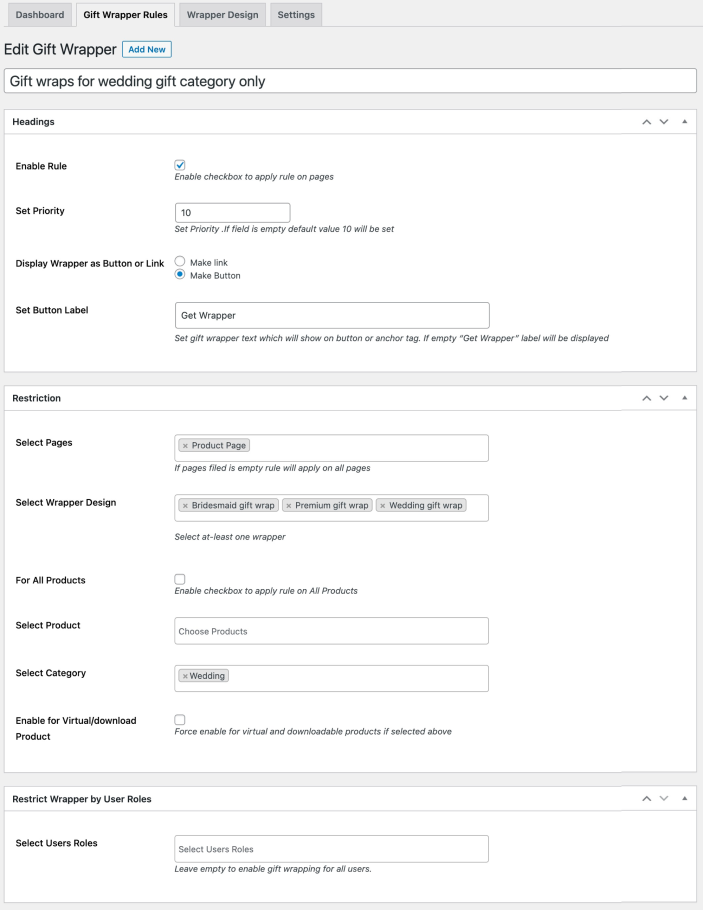
You can create multiple gift wrap rules to assign designs to specific products, categories, user roles, and more.
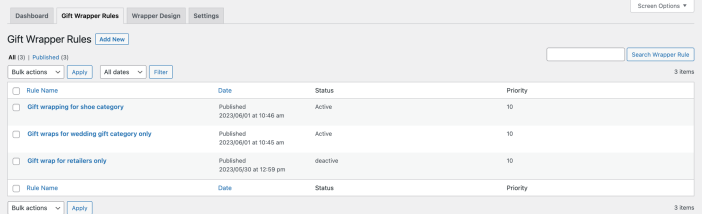
While creating a new gift wrap rule you can customize the following options,
- Active rule
- Set rule priority (If multiple rules are interacting which do you want to implement. 1 priority is highest)
- Display wrapper option as button or link
- Customize button label
- In the Select Pages option, you can select the product page, cart page, and checkout page to show the gift wrapper
- Select wrapper designs – The designs you have created in step one are listed here to be attached to this rule
- Enable for all products or specific products and categories
- By default, gift wrappers will not be displayed for virtual products. If needed, you can force enable using the “Enable for Virtual/download Product” checkbox
- Restrict gift wrap based on user roles, leave empty to enable for all users
Go to
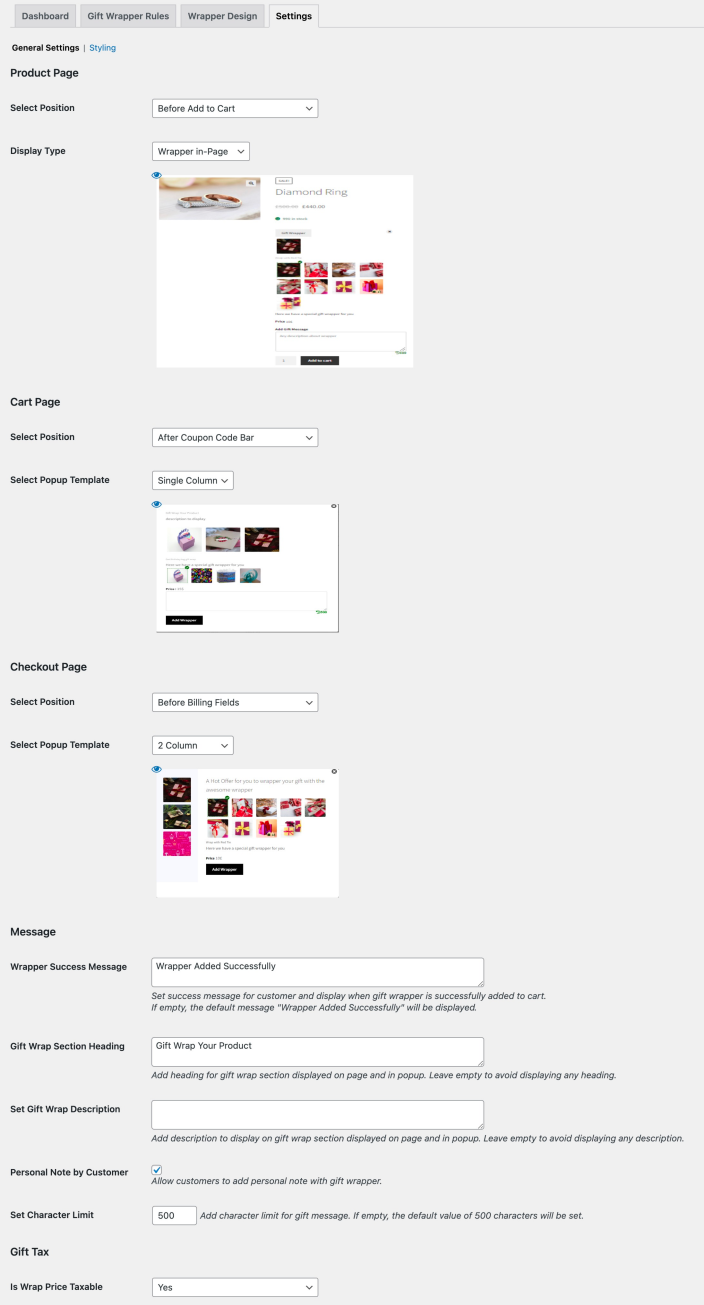
WooCommerce > Gift Wrap > Settings tab to access extension customization settings.
- Product Page:
- Customize the gift wrap button position before or after add to cart
- Show wrappers in a popup or within the page
- Cart Page:
- Customize the gift wrap button position for the cart page (4 default positions + shortcode)
- Use a single or 2 columns popup template
- Checkout Page:
- Customize the gift wrap button position for the checkout page (5 default positions)
- Choose from a single or 2 columns popup template
- Customize Messages:
- Gift wrap success message
- Gift wrap popup heading and description
- Enable personal notes by the customer
- Set character limit for a personal note
- Tax:
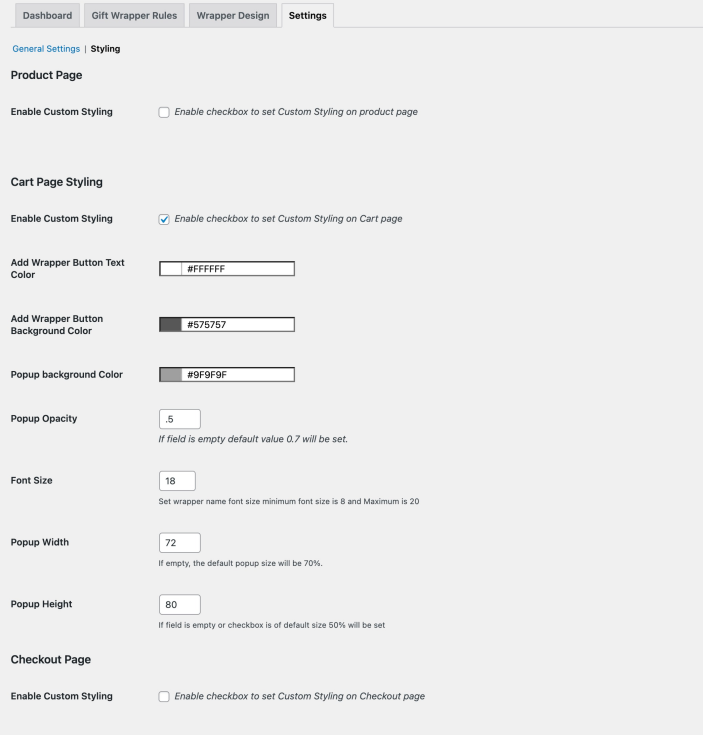
The extension comes with extensive styling options. If you don’t like the popup, you can customize the popup size, layout, background color, text colors, font size, and more.