WooPayments is designed to be fairly straightforward and intuitive to use. However, there are still some settings that each merchant will want to configure to their liking. This page is intended to explain in detail what each option does and how it might be used.
The WooPayments settings can be found under Payments > Settings.
NOTE: After adjusting any WooPayments settings, you will need to scroll to the bottom of the page and click the Save Changes button. Any changes to the settings will not take effect until they are saved!
General
↑ Back to topThis section contains some basic options that likely won’t need to be changed very often.

Enable WooPayments
↑ Back to topUnchecking this option will make it so that WooPayments is no longer offered as a payment method during checkout. This means that, if the box is unchecked, customers will not be able to pay via WooPayments.
What this setting does not do is disable the WooPayments plugin entirely. In other words, even with this box unchecked, you will still be able to access the Payouts, Transactions and Disputes pages, as well as issue refunds and so on.
If you want to completely disable the WooPayments plugin, please see this page.
Test mode
↑ Back to topCheck this box to enable test mode. Test mode lets you try out payments, refunds, disputes and other such processes as you’re working on your store without handling live payment information. Unchecking this box disables test mode and switches your site into live mode, meaning that it will accept real payment methods and actually charge your customers.
Please see our Testing WooPayments page for details on how to use test mode.
Payments accepted on checkout
↑ Back to topThis section allows you to add and edit the payment methods that customers can use to complete purchases on your site.

By checking the boxes in this section, you can also offer additional payment methods to certain customers. Offering these payment options can increase the chances that visitors to your site will purchase from your store.
NOTE: It is not currently possible to uncheck the Credit card / debit card option.
Buy now, pay later
↑ Back to topThis section contains buy now, pay later payment (BNPL) methods. These can help boost sales by offering customers more buying power and flexible payment options.

Please see our BNPL documentation to learn more about these payment methods.
Express checkouts
↑ Back to topThis section controls which express checkouts are used on your site and how they look.
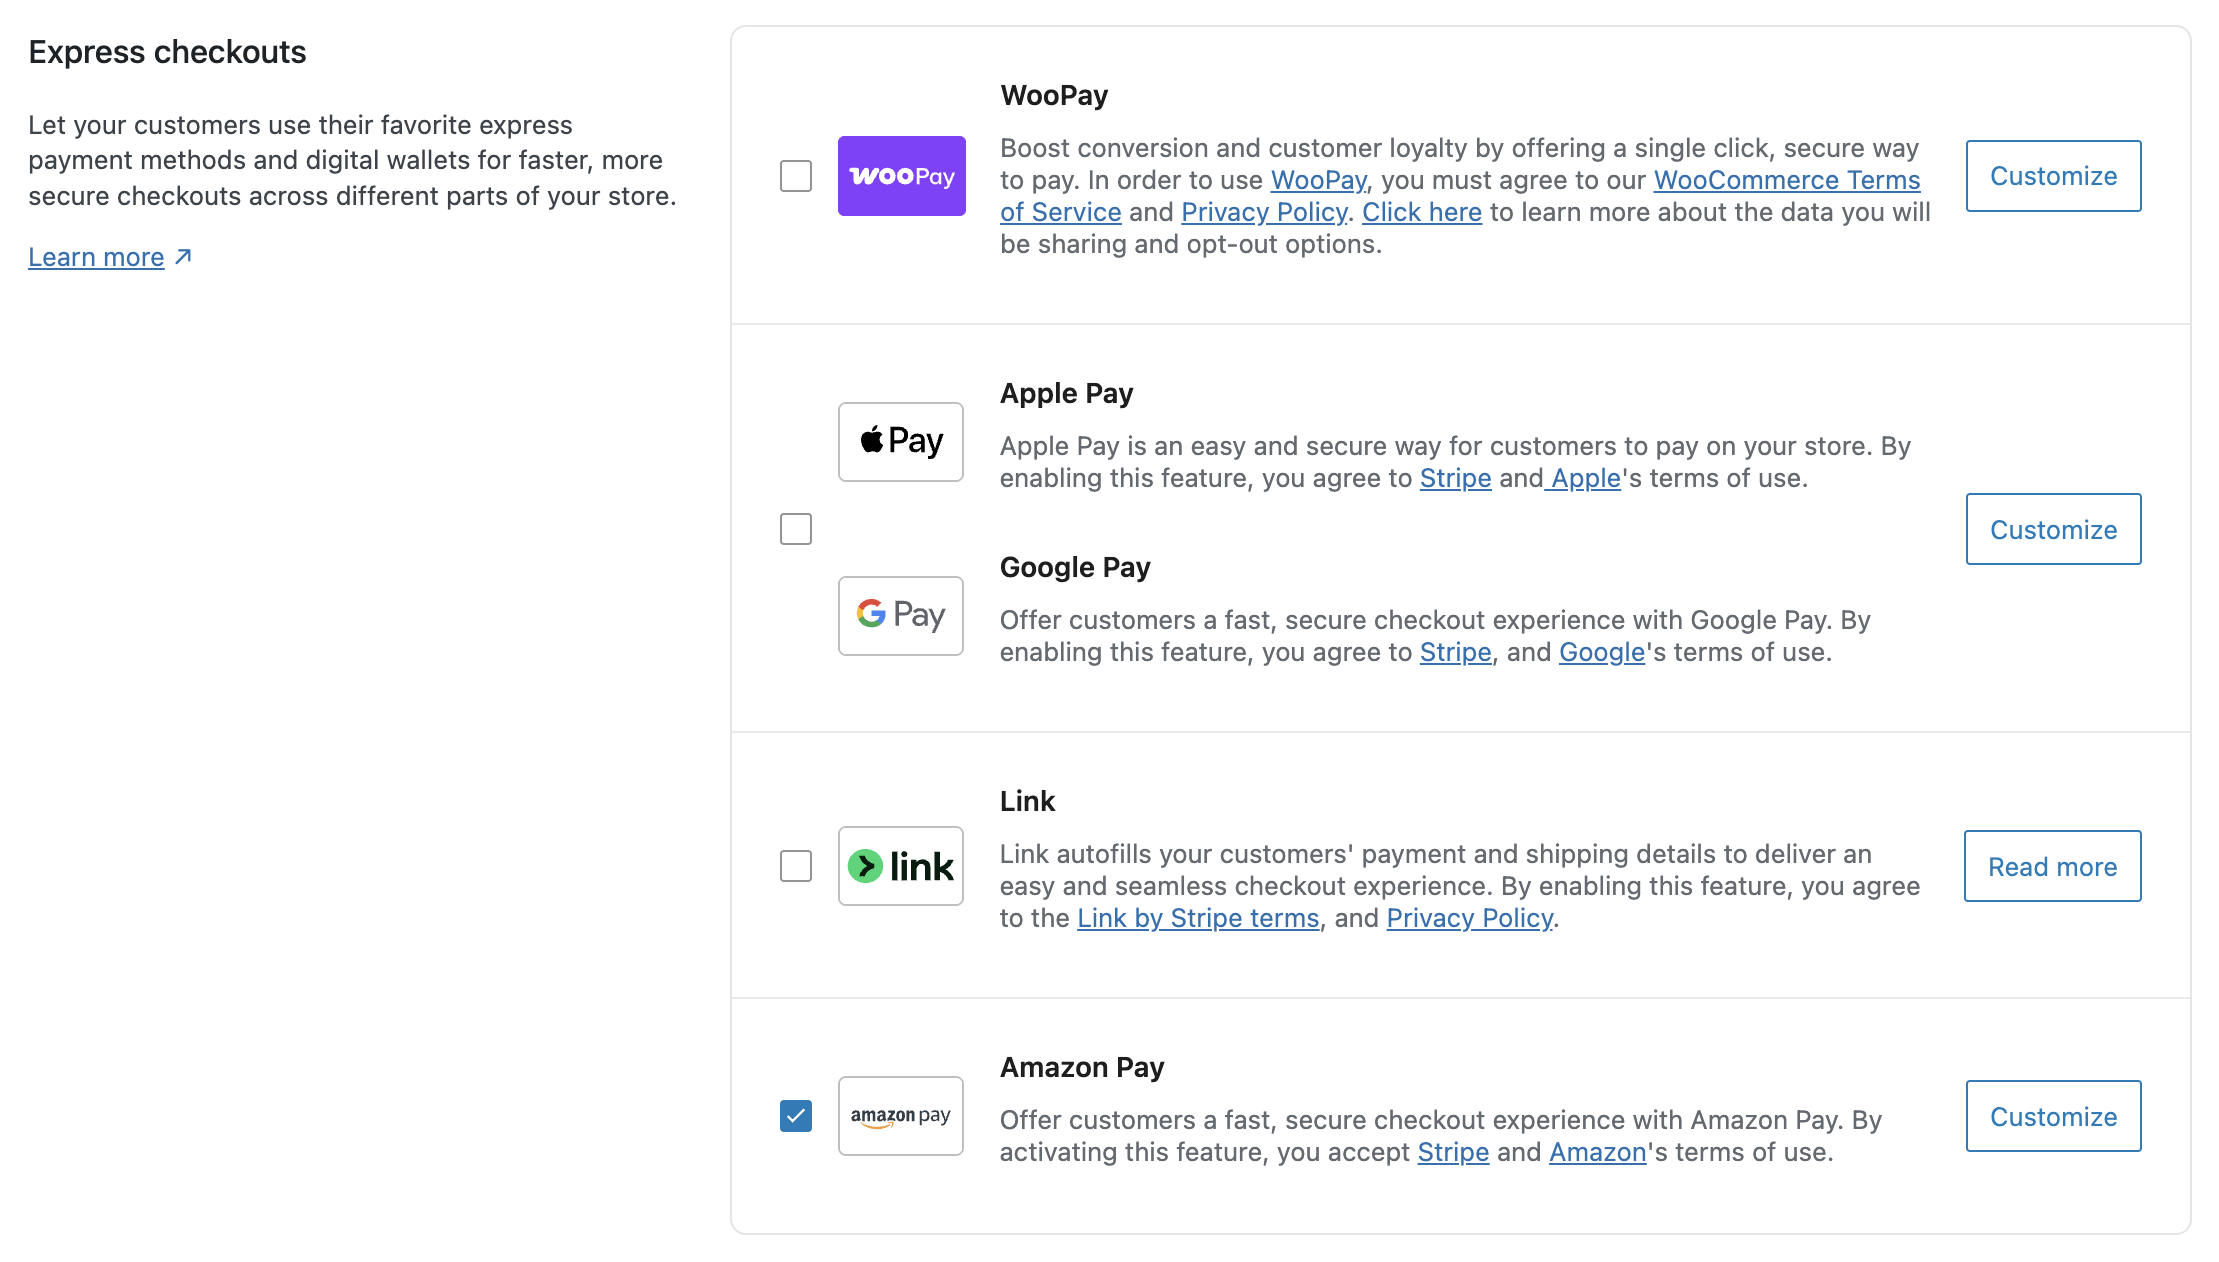
Express checkout methods are so named because they allow customers to check out faster than if the customer had not used one of these methods. WooPayments has the following express checkout methods built in:
Please see the links above for more info on each method and its settings.
NOTE: WooPay and Link by Stripe are currently incompatible. You cannot have both express checkout methods enabled at the same time.
Transactions
↑ Back to topThis section contains a settings related to how transactions function on your site, and how they appear to customers in emails, receipts, and bank statements.

Transaction preferences
↑ Back to topEnable payments via saved cards, if checked, allows customers to save their card info to their account on your site, which allows them to check out much faster if they make more purchases from you in the future.
NOTE: As detailed in our PCI compliance doc, the actual credit card number and other details are stored on our secure server. They are presented to customers on your site via a secure tokenization method.
The Enable manual capture setting, if checked, prevents WooPayments from automatically capturing charges. This allows you to manually capture the charge at a later time, such as when you ship the item.
If you enable this, it’s important to know that you will need to capture each order within 7 days of it being placed. Otherwise, the authorization and the order itself will be cancelled.
NOTE: We have a detailed guide to this workflow which you should review before enabling this setting. Our suggestion is that you leave this option disabled unless you have a very specific and well-justified use case in mind.
Customer statements
↑ Back to topThe Customer bank statement setting controls how charges from your store appear on bank statements or in online banking systems.
By default, WooPayments will use the site URL for the statement descriptor. In the event that no statement descriptor is available, WooPayments will be used. You can learn more about the default WooPayments statement descriptor here.
You can change the statement descriptor if need be, but it must adhere to these rules:
- Contain only Latin characters.
- Japanese merchants will also see descriptor fields for kanji and kana.
- Contain between 5 and 22 characters, inclusive.
- Contain at least one letter.
- Not contain any of these characters:
< > \ ' " * - Reflect your business name clearly.
Please see this page for more details on recommended statement descriptors.
The Support email and Support phone number settings determine what contact information is shown on receipts, invoices, and automated emails from your store.
We strongly suggest filling these settings out, since they can help prevent disputes from customers who might otherwise have trouble contacting you for assistance. If you don’t have a dedicated support email or phone number, we still recommend adding something here, even if it’s a personal email or phone number.
NOTE: The customer support email and phone number settings covered here are not the same as updating the email or phone number that you have on file in your Stripe Express account. To do that, please see this page.
Payouts
↑ Back to topThe Payouts section controls how often WooPayments pays out money from incoming orders into your linked bank account or debit card.

Payout schedule
↑ Back to topThis setting allows you to specify a payout schedule that works best for your business. You can find more information on the options in our dedicated payout schedule document.
If it’s been less than 7 days since your first transaction with WooPayments, you will not be able to change your payout schedule until the initial 7 day waiting period has passed.
Payout bank account
↑ Back to topYour bank account or debit card details are securely stored and managed with our payments partner, Stripe. You can use the link in this section to access the Stripe dashboard, through which you can view and update your bank account or debit card information, if need be.
Account notifications
↑ Back to topWooPayments sends various notifications to you via email, e.g. about disputes and so on. The Account notifications setting controls which email address we use for those.
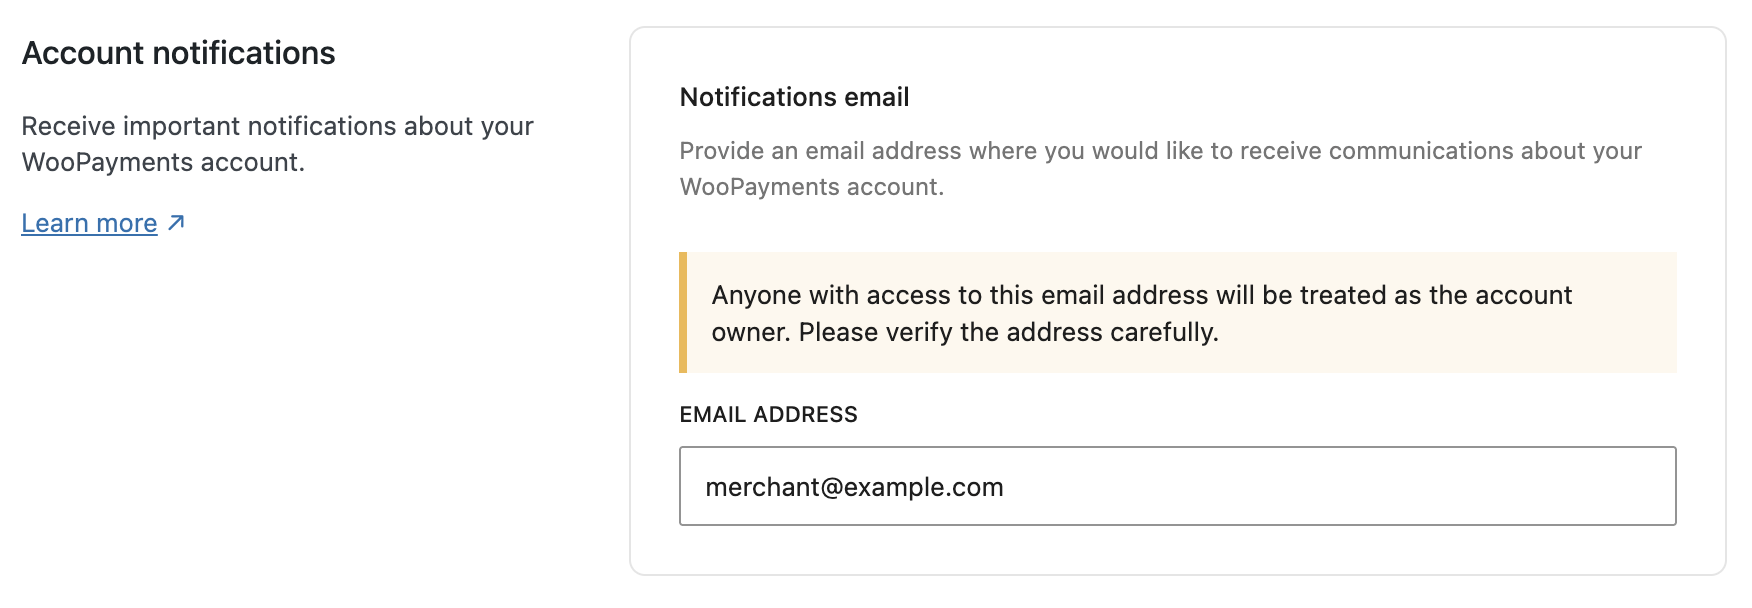
NOTE: The Account notifications email is treated as an owner-level contact for support purposes. Anyone with access to this address can request account changes or retrieve account information through our support team, so it should only be set to an address controlled by an authorized account owner.
If you want to change which email address we send WooPayments-related notifications to, simply enter a new email in this field, enter the address again in the second field to confirm, and click Save Changes at the bottom. The old email address will be sent one last notification informing them of the change.
Note that this setting only controls where WooPayments emails go. Other WordPress or WooCommerce notification emails are not affected. Also, changing this setting is not the same as changing the personal or account email for your Stripe Express account.
Fraud protection
↑ Back to topOur Fraud protection feature offers rules which you can use to block suspicious orders before they get placed. This can help you avoid carding attacks and increased disputes.

In short, when an order is placed, the fraud protection engine will evaluate that order according to the risk level you’ve selected here. Depending on your configuration, the order can either be allowed as normal or blocked outright.
We suggest that most sites use the Basic risk level, but you can optionally use the Advanced setting to configure specific fraud protection rules to best suit your business type, risk tolerance, and other factors. To learn more, please consult our dedicated page.
Advanced settings
↑ Back to topThe Advanced settings section gives you further flexibility in managing your WooPayments configuration. While you may not interact with these settings regularly, you can find them at the bottom of the settings page.

Enable multi-currency
↑ Back to topEnabling this lets you to accept payments from customers in currencies besides your shop currency. Please see our docs on accepting multiple currencies for more information.
Enable Stripe Billing for future subscriptions
↑ Back to topThis setting is only shown if you have Woo Subscriptions activated in addition to WooPayments. If you have both, you can choose between the on-site billing engine provided by Woo Subscriptions, or the off-site engine powered by Stripe Billing.
Please see our Stripe Billing document for full details on this feature.
Debug mode / Log error messages
↑ Back to topWith this option enabled, WooPayments will write debugging information to a log file. During normal operations, this is not necessary, but our support staff may direct you to enable debug mode if you contact us about an issue with WooPayments.
To view the log files and send them to us:
- Go to WooCommerce > Status > Logs in your site’s dashboard.
- Find the WooPayments log from the relevant date and click to open it.
- Click Download to save the log file to your computer.
- Attach that file to your email response to our support staff.
After the relevant issue has been resolved, feel free to disable debug mode again.
NOTE: By default, log files are only kept for 30 days.
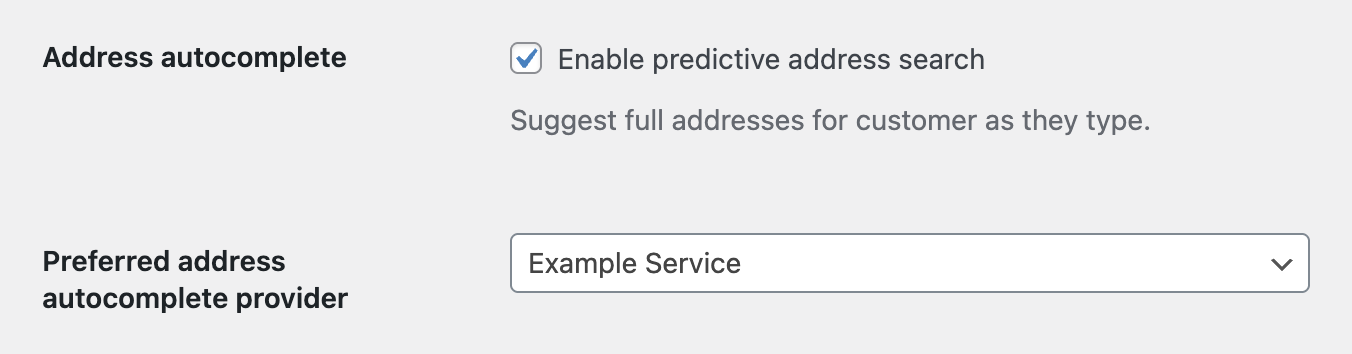
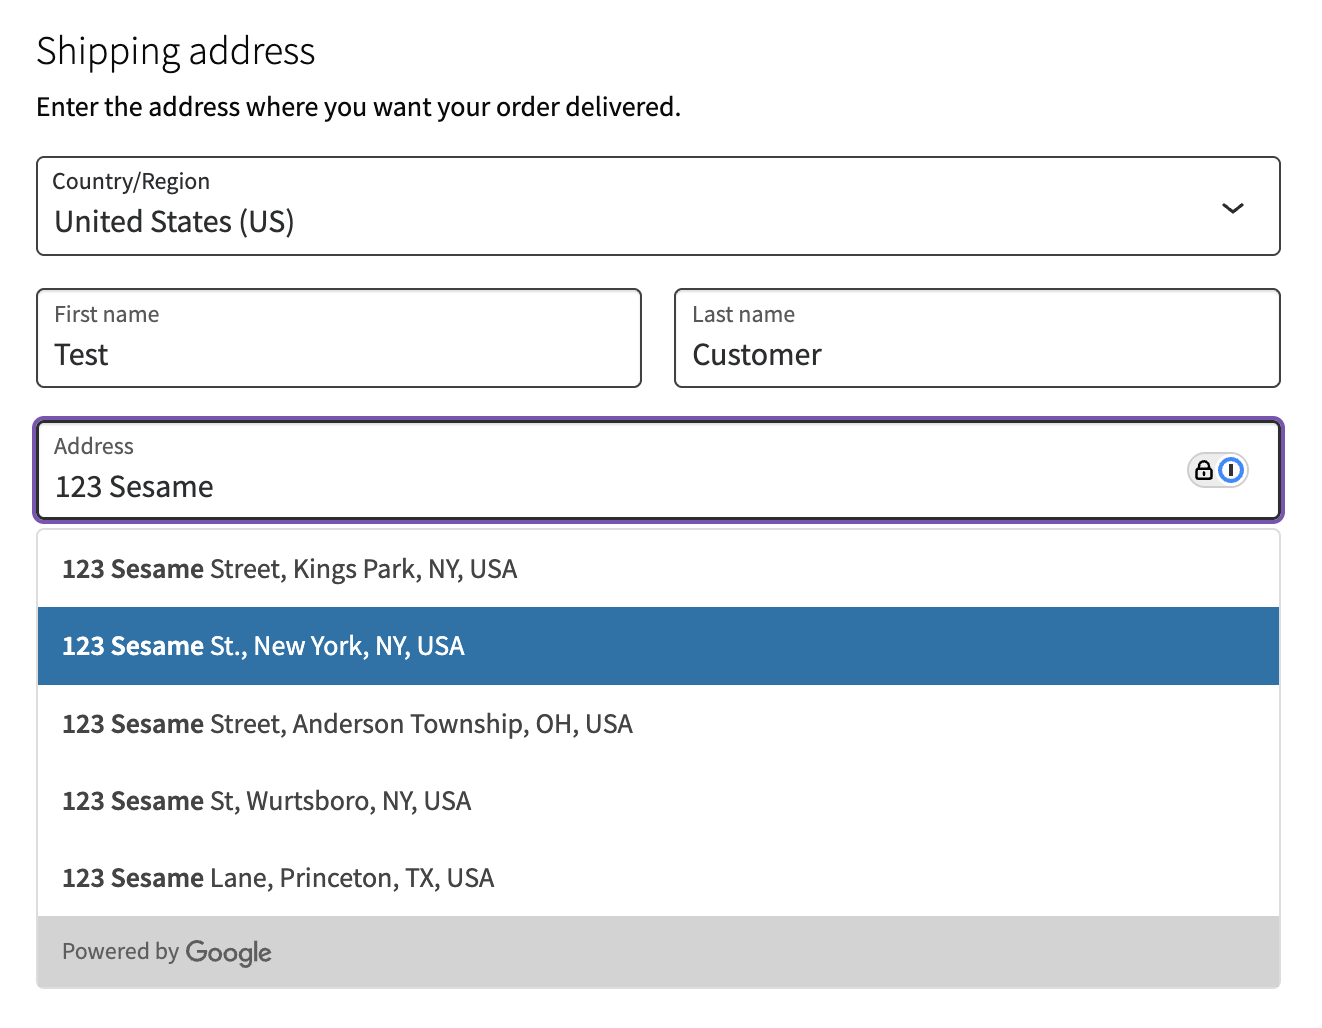
Address autocomplete
↑ Back to topWooPayments also enables one setting outside of the Payments > Settings page, which is an address autocomplete option for the checkout page.
This streamlines the checkout experience via predictive address search, which reduces customer friction and as well as improves address accuracy. It requires WooCommerce 10.3 or later, and WooPayments must be enabled in checkout.
To enable address autocomplete:
- Go to WooCommerce > Settings > General.
- Check the Address autocomplete box in the General options section.
- Scroll to the bottom and click Save Changes.
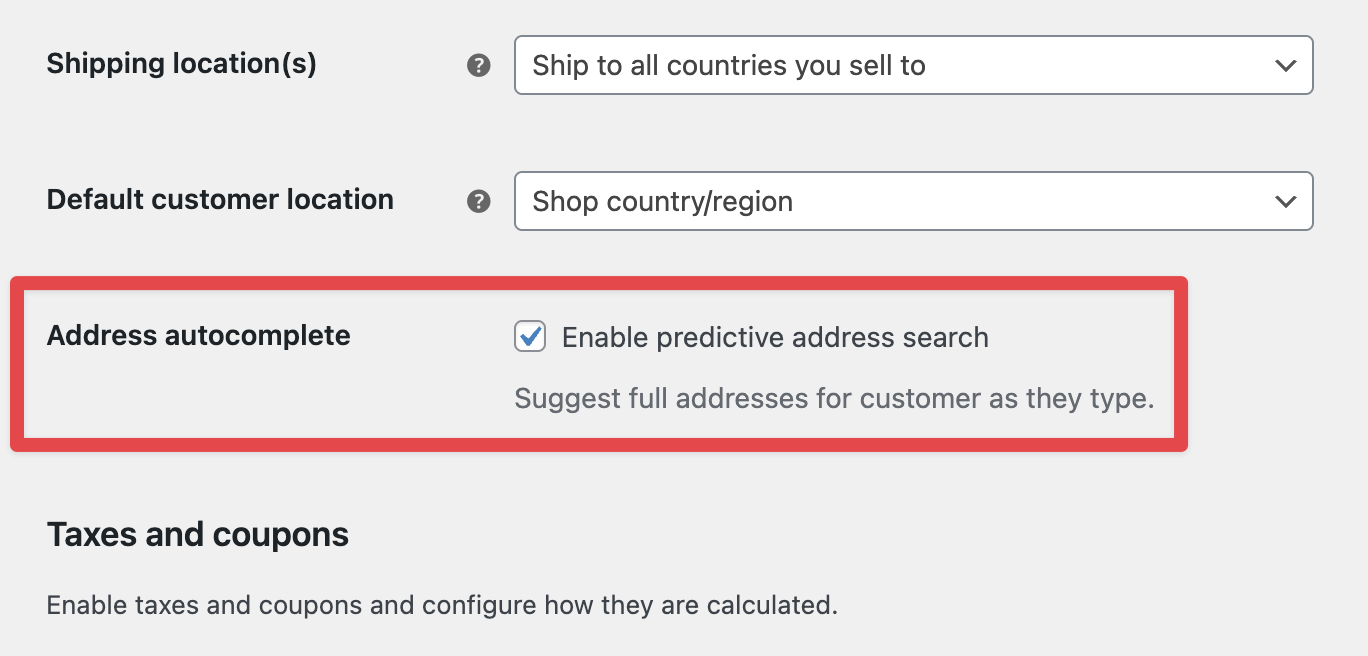
This allows customers to more easily find and enter their entire address in the billing or shipping fields during checkout. It will work for any active payment method, so long as WooPayments is enabled in checkout.
If more than one service is available for address autocompletion (e.g., if another plugin adds a different service), there will also be a Preferred address autocomplete provider setting shown. This allows you to pick the address search provider of your choice.